
Rowing - Specific Scripts / Rigging and Equipment
Boat-Categories / FAQs + Frequently Given Wrong Answers / Rigging of Boats / Recommended Measurements 
Rigging of Boats 船隻設備調整
1.) Why should we adjust / rigg a boat individual?
The rowing boat is one of the most complex sports equipment, used in sport nowadays, because of the many possibilities to adjust / vary it.
The task is to enable the athletes to use their physiological performance abilities and transfer it into the water to produce motion = driveway. Besides the rowing technique, the boat adjustment is one part, most responsible that the rowing technique is most effective, economically and this way done without mistakes. Only a few maneuvers are a necessary and a world champion will not be able to win even a club regatta.
Now an old rowing slogan says: A good rower is rows with every boat! This often used phrase is surely right, because a good rower is able to correct mistakes in the equipment better than a beginner. But the real question is: How fast, how long and with which effect on the performance ability, the health and the fun in rowing sport? The beginner will row with all kind of equipment and the feedback, given by the wrong adjusted boat, will lead him/her from the beginning on to a faulty technique imagination and practice.
A beginner with a good adjusted boat will learn a good and right rowing technique easily and nearly alone, how several researches have proved right.
To be able to row without disturbing, the sport equipment boat has to be adjusted individual. Only this way it is possible to row with a good technique, relaxed and without cramping, and without the resulting damages to the body, over a long distance. Only this way the rower is able to find the optimal individual position in the boat, which enables the athlete, to use all his/her existing energy to produce driveway instead of losing the energy by using it to balance and stabilize the boat.
Resume - The boat has to be adjusted / rigged if possible individual because:
- To enable the athlete to learn and practice without faulty technique,
- To prevent problems and damages,
- To assure the wellness during the practice in this sport,
- To enable the full use of the individual performance ability,
- To produce effective and economical drive,
- To get closeness in a team, to row fast.
The individual rower with his/her anatomic and physiologic prerequisite is the reference person in the boat adjustment. No matter if rowing in a team boat or in a single, the rowing place should be adjusted on him/her. It is fact, that an athlete during his/her rowing life changes steadily, and that on these changes in rowing technique and sensomotoricity has to be reacted.The optimal boat adjustment for one rower can change after a while, and are depending on changing partner as well as changing the boat category. In the case of frequent team changes, the boat can be rigged with standardized adjustment. With these the rower is able to row good, but not optimal.
While purchasing a new boat you should bear in mind that the following points are calculated also, to have the possibilities to adjust the boat individual later:
- The average weight of the team, who are supposed to row in this boat.
- The medium oarlock-height with an acceptable range of possibilities for the adjustments.
- Minimum and maximum span.
- The position of the oarlock towards the shoulder of each rowing place.
- Specialties as: Type of oarlock, length of the slides, seat, shoe-size, Foot-stretcher, Steering-shoe (Stroke-side / Starboard-side).
You can get special forms at each boat-factory.
2.) Measuring-Devices / Tools / Equipment
2.1) Measuring-Devices:
Trimming and rigging the right way is relative easy to learn.
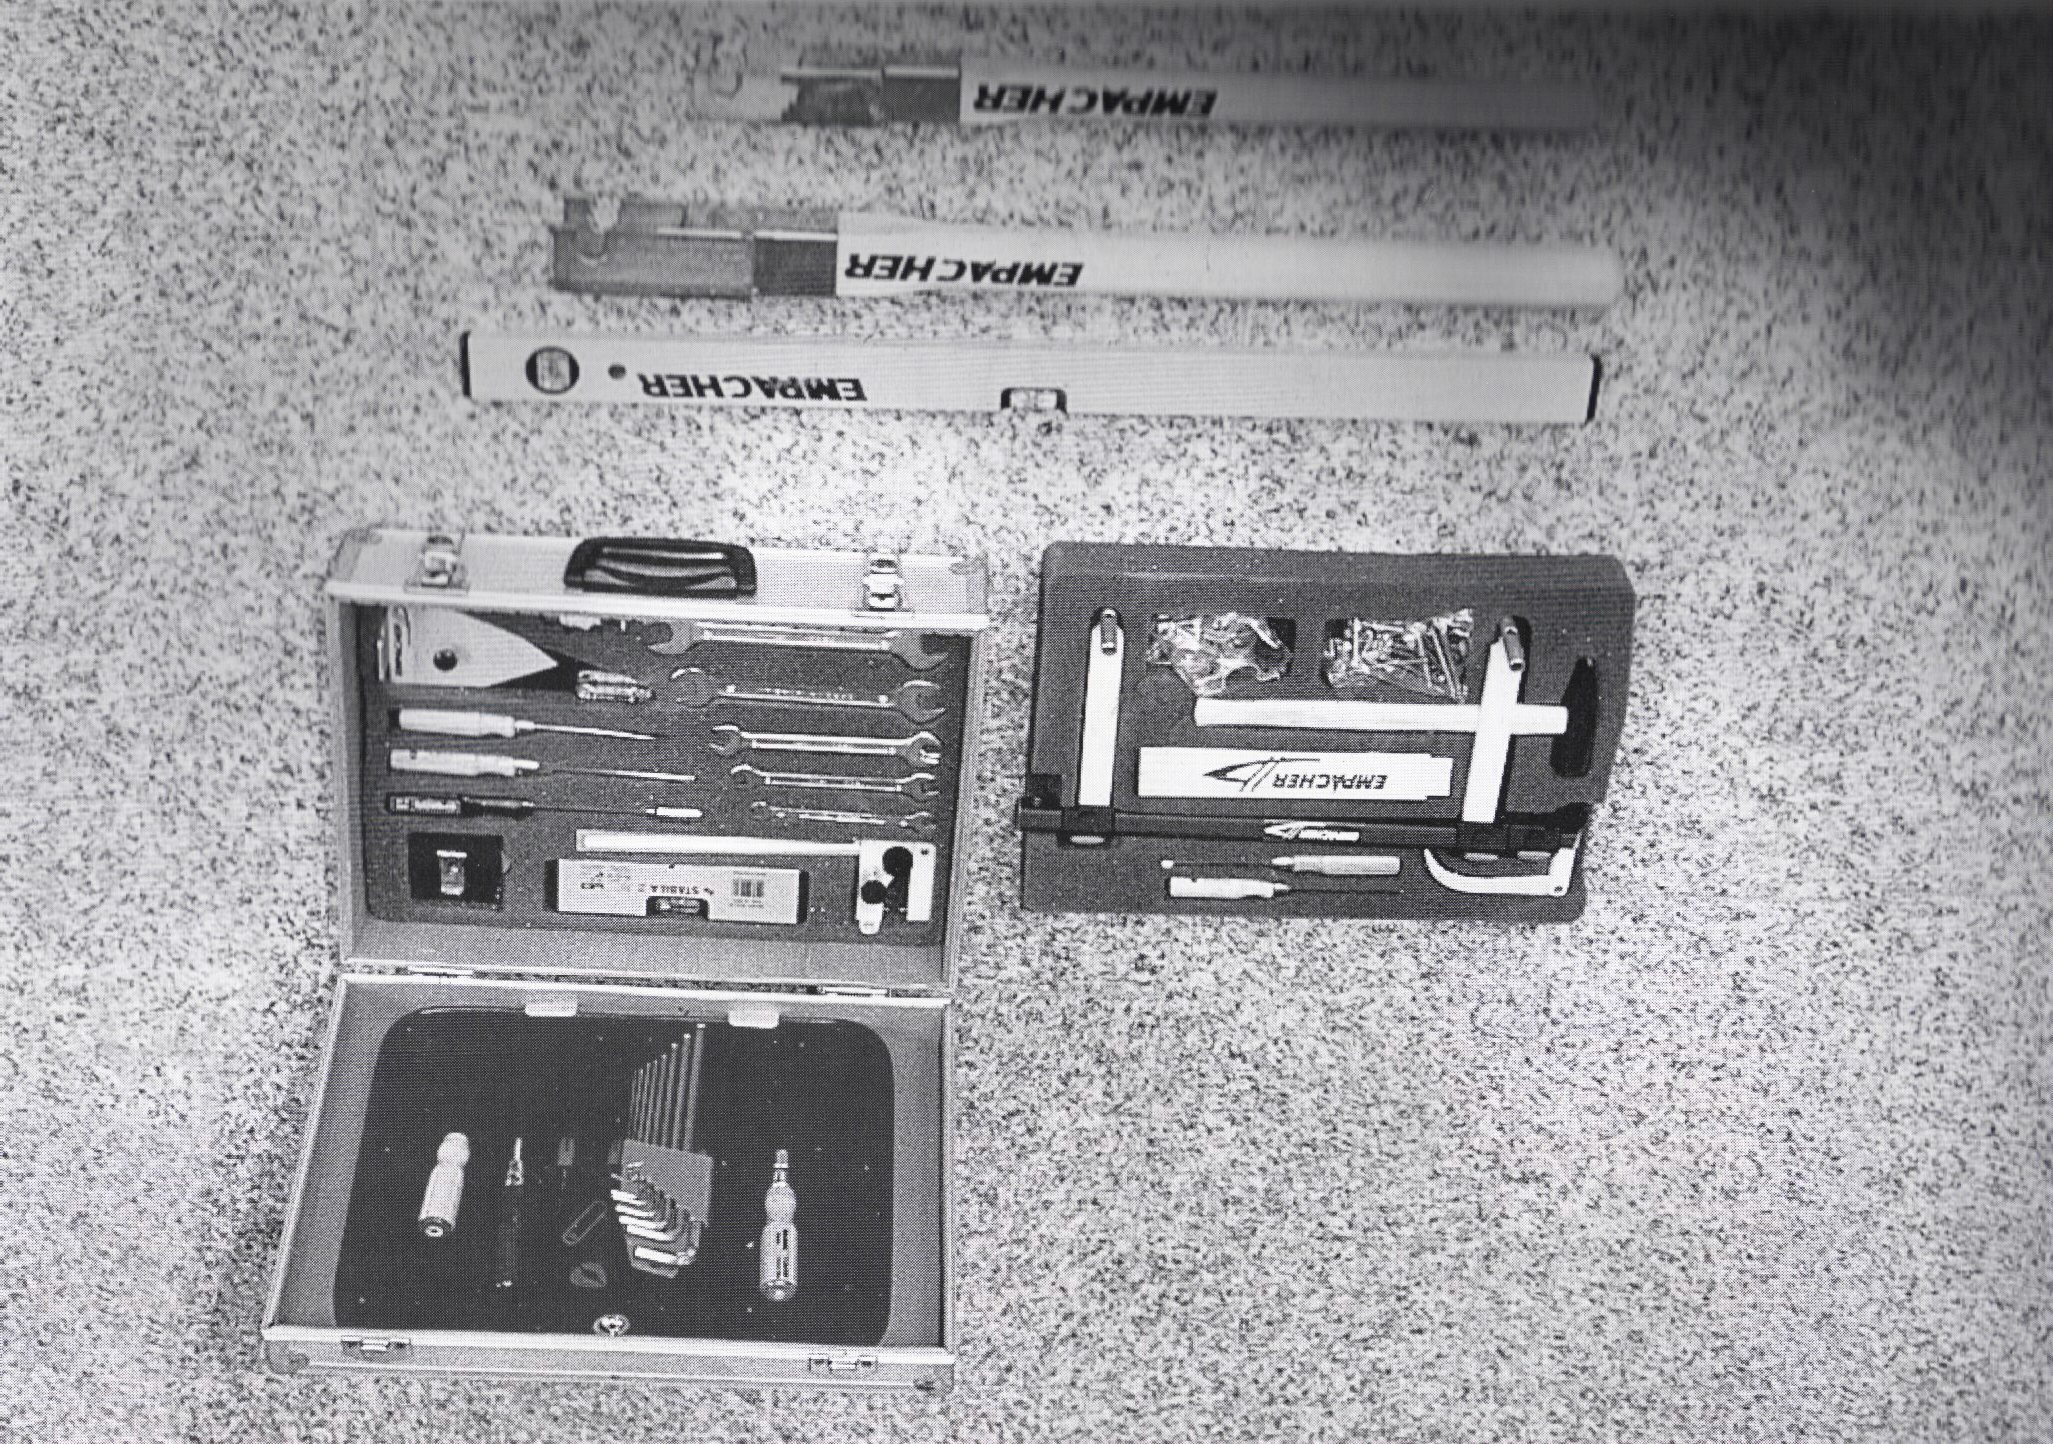
You need the following tools and measuring equipment.
Height-stick, Measuring-Devices for the Oarlock-Pin, Metre Rule (2m), Ruler, Measuring Tape (5-8m), Protractor, Pitch meter, 2 Water-level/ Spirit-Level (long + short).2.2) Tools / Equipment:
Spanner / Wrench 8-19mm, Rigger-Wrench (10mm), Screwdriver (+/- /small/big), Slot-Washer 0,5-2mm, Permanent Marker, Persuader for Scull- and Sweep-Rigger
3) Trimming Order / Step by Step
To enable an efficient working it is useful to make a systematic plan of each step. This avoids that already finished jobs are changed again by the next job.
The following table shows the order for measuring / adjustment, the necessary measuring-devices / tools and adjustment possibilities.
|
4. The Oarlock-Height
The distance between lowest point of seat and the lowest point inside the oarlock.
The right oarlock-height is required for a proper rowing technique with an effective blade work, the well being inside the boat as well as for an orthopedic useful rowing movement.Too low work-height will lead automatically to more work of lifting- and holding the blade during the drive, result in problems in catch and extraction and also during the phase of recovery. This can lead to an early tiring as well as to chronically aches.
High riggers can guarantee out of the biomechanical sight at the front and middle part of the stroke an optimal drive-directed movement as well as a longer stroke in all. The anatomic necessities of the human being do not allow the draw of the stroke out of this position effectively up to the finish, so that the finish can not be drawn with enough power or not at all.
Furthermore balancing problems during the recovery can occur. The right work height is a compromise out of biomechanical optimum and anatomical requirements, which is looking different due the anthropometrical reference of each athlete.
Not to underestimate are the moving proportions in a team-boat that occur with the different circumstances for the rowers.
If too light or too heavy teams are rowing in one boat the rule applies:
- A change of the average team weight by 10 kg lets the boat dive 1cm more or less.
As a good and common measurement for the oarlock-height / work-height the following recommendations can be given.
|
The recommendations are related with a perfect fitting boat. They can differ up to 2 cm up or down depending on the weight of the too light or too heavy rower. The 1 cm lower level at the sweeping rigger results out of the longer inboard in sweeping oar, compared with sculling, which leads automatically to a higher work-height of the outside arm.
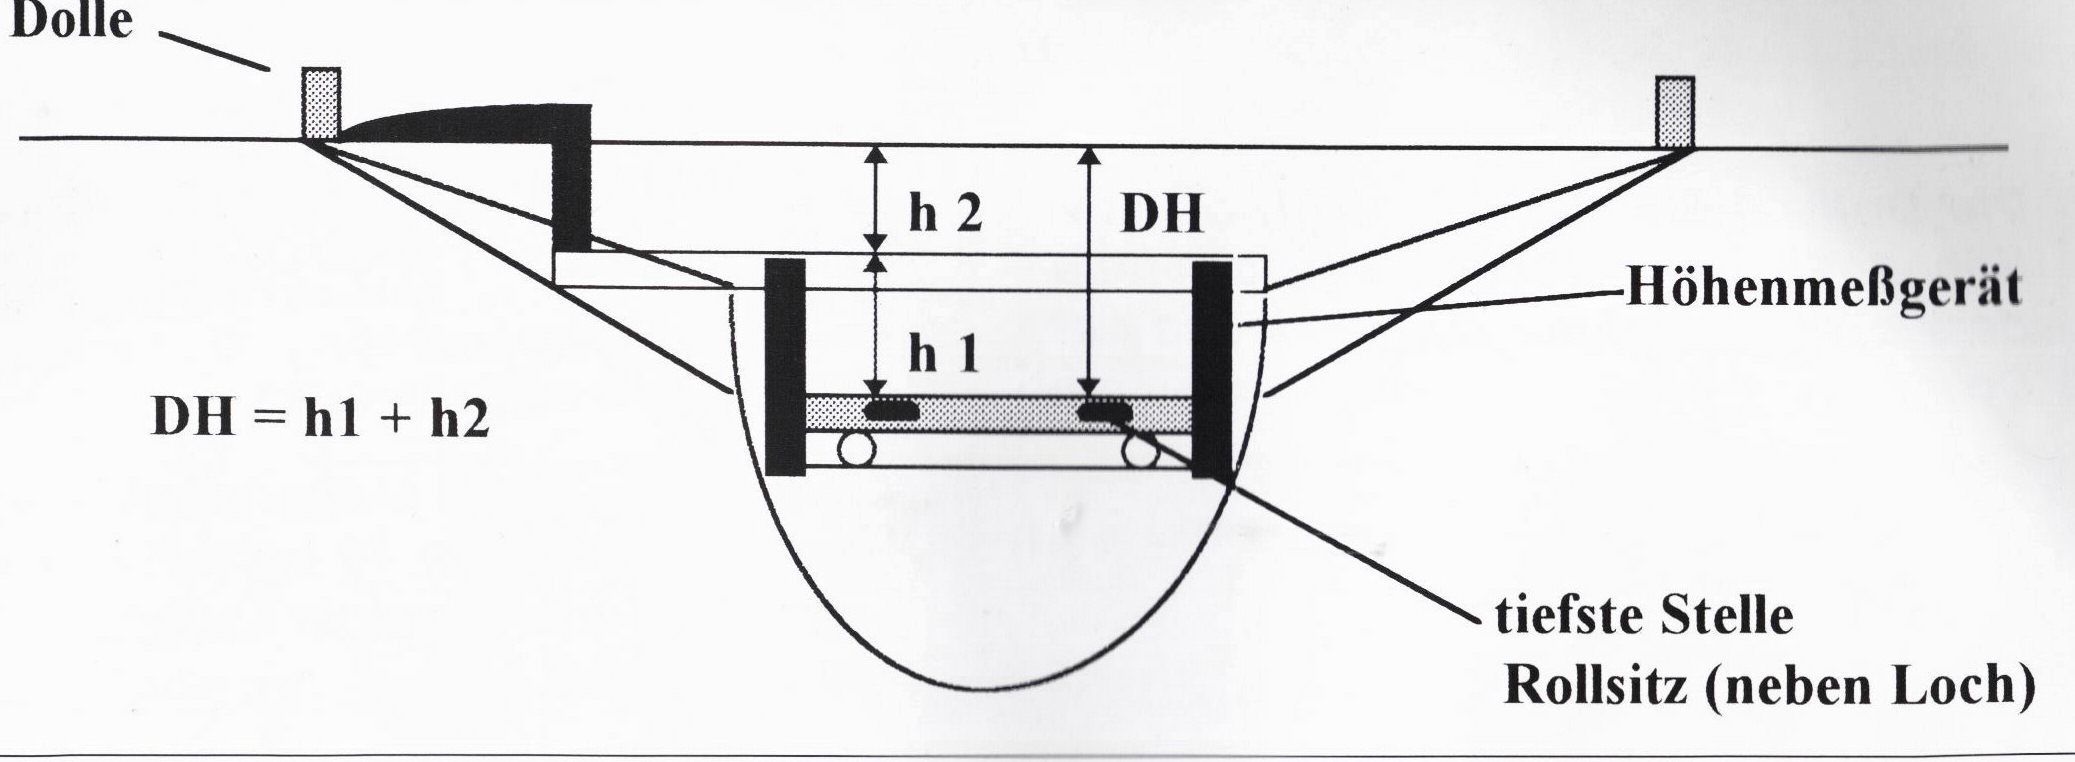
Pic.: Units of measurements to determine the work height, working with the height-stick
4.1 measuring and adjusting the Oarlock / Work-Height
|
To determine the work height 3 common measuring devices are used:
|
4.1.1 Measuring with the height-stick
Put the height-stick on the slide or landing and fix it well with the hand. Measure the distance between lowest point of the seat and the top of the height-stick (d 1). Put the grope on the lowest point inside the oarlock. Measure the distance between the grope and the top of the height-stick (d 2). The work-height = (d 1 + d 2)
4.1.2 Measuring with the parallel-stick
This method only works if both gunwhale are evenly high. To control of the gunwhale:
Put a short water-level on the slides and a long water-level across the boat over the gunwhale. If both levels are equal is the board OK. If not it has to be equalized until it is equal. (Important: always measure at the same point!)
Put the parallel-stick on the gunwhale. Measure the distance of the lowest point of the seat to the top of the gunwhale (d 1) and from the bottom of the parallel-stick to the lowest point inside the oarlock (d 2). The work-height = (d 1 + d 2)
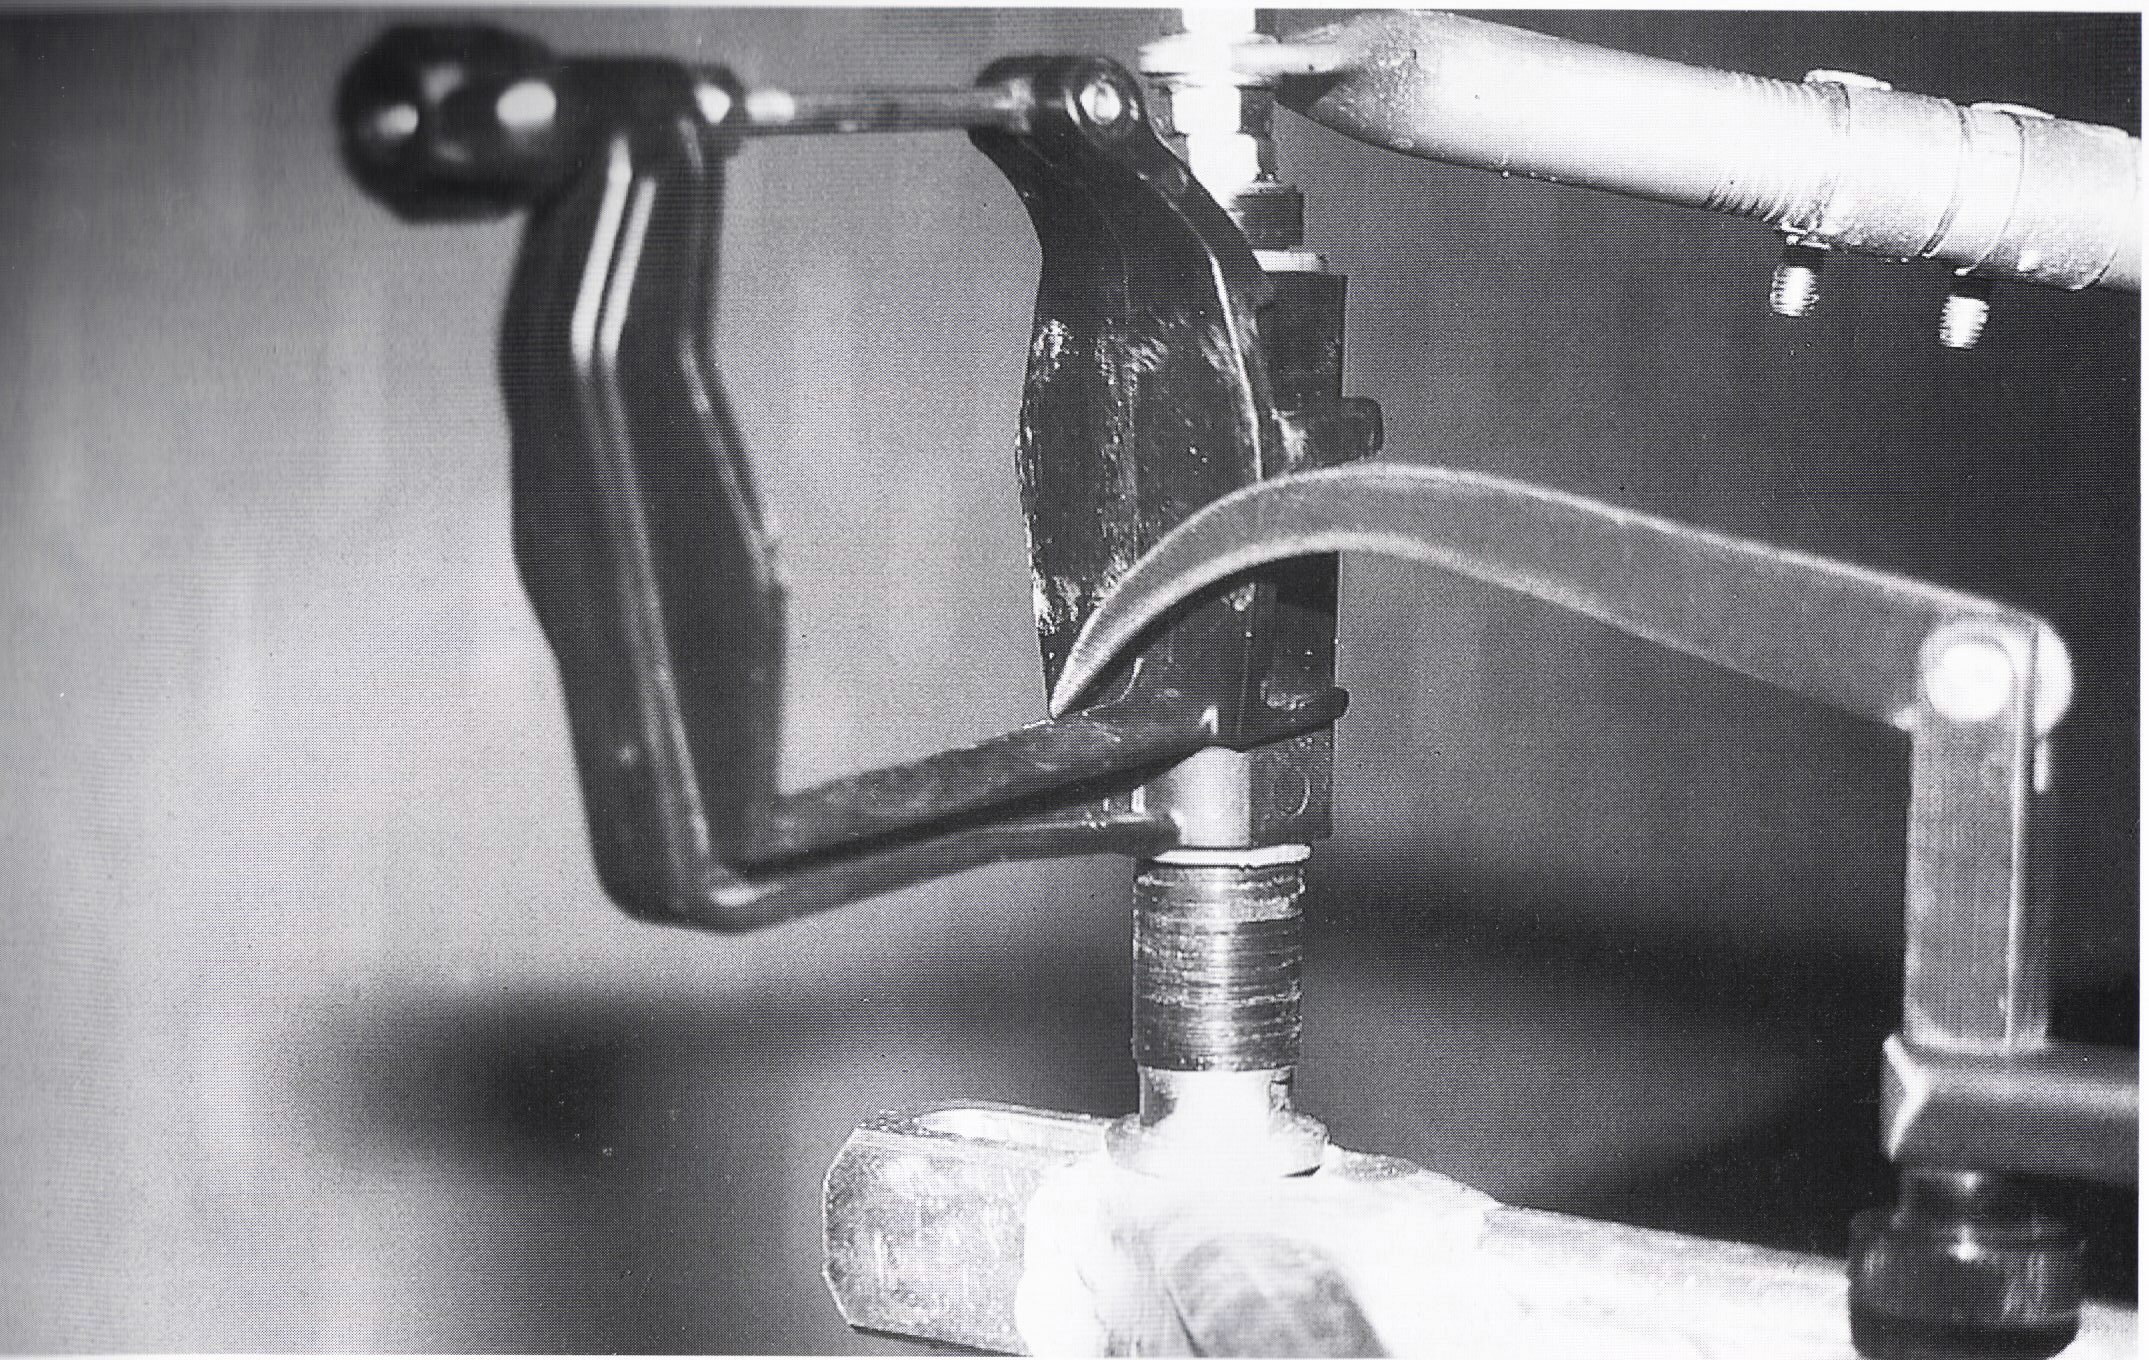
Pic.: measuring with the height-stick
4.1.3 Measuring with a long water-level
Put the boat in perfect horizontal level cross the boat length angle
(Use a short spirit-level on the slide) and fix it in this position. Put one end of the long water-level on the lowest point inside the oarlock and get it also in a horizontal level.
Measure the distance between the bottom of the water-level and the lowest point of the slide-seat (d 1). The work-height = (d 1)
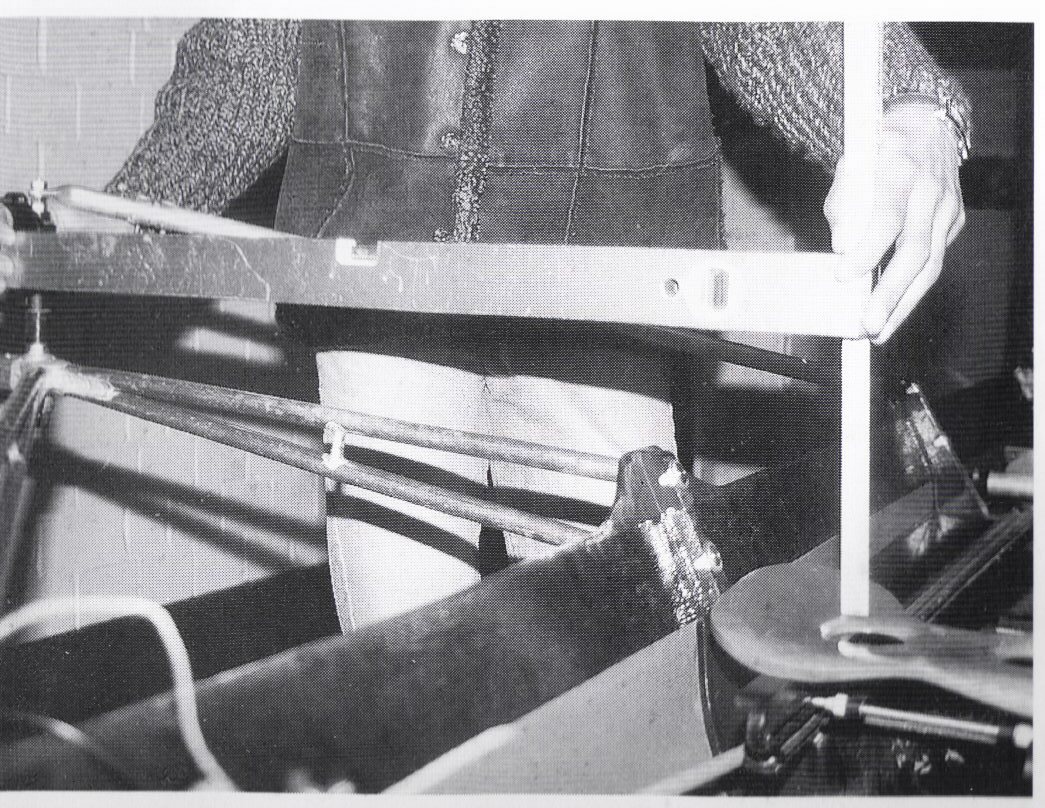
Pic.: measuring with the long water-level
4.2 Adjusting the Work-Height
|
The change of the work-height with slot-washer should be avoided. Putting washer between board and rigger will result in a change of the angle of the oarlock-pin (inside- or outside-angle).
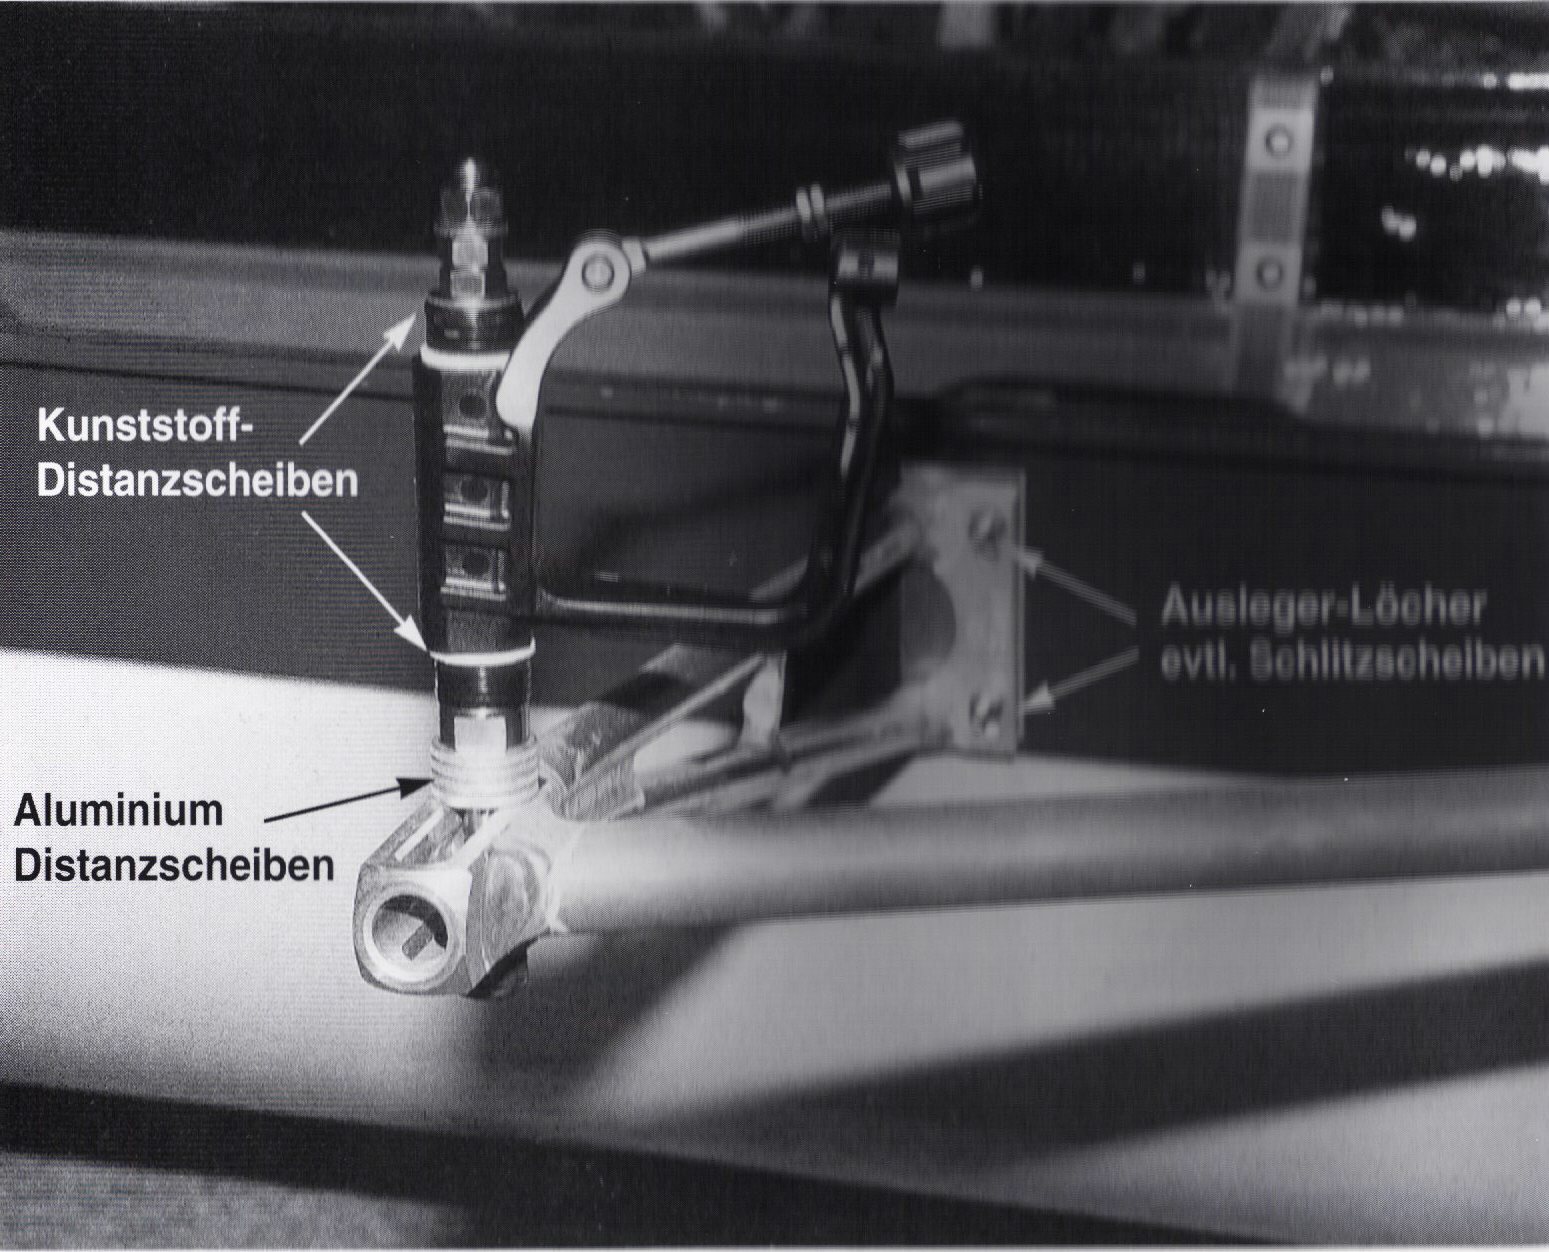
Pic.: Possibilities to adjust the work-height
5. The Position of the Oarlock Lengthways to the Boat
The modern boats with wing-rigger have several possibilities to change the position of the rigger towards bow or stern without the problems of the older models
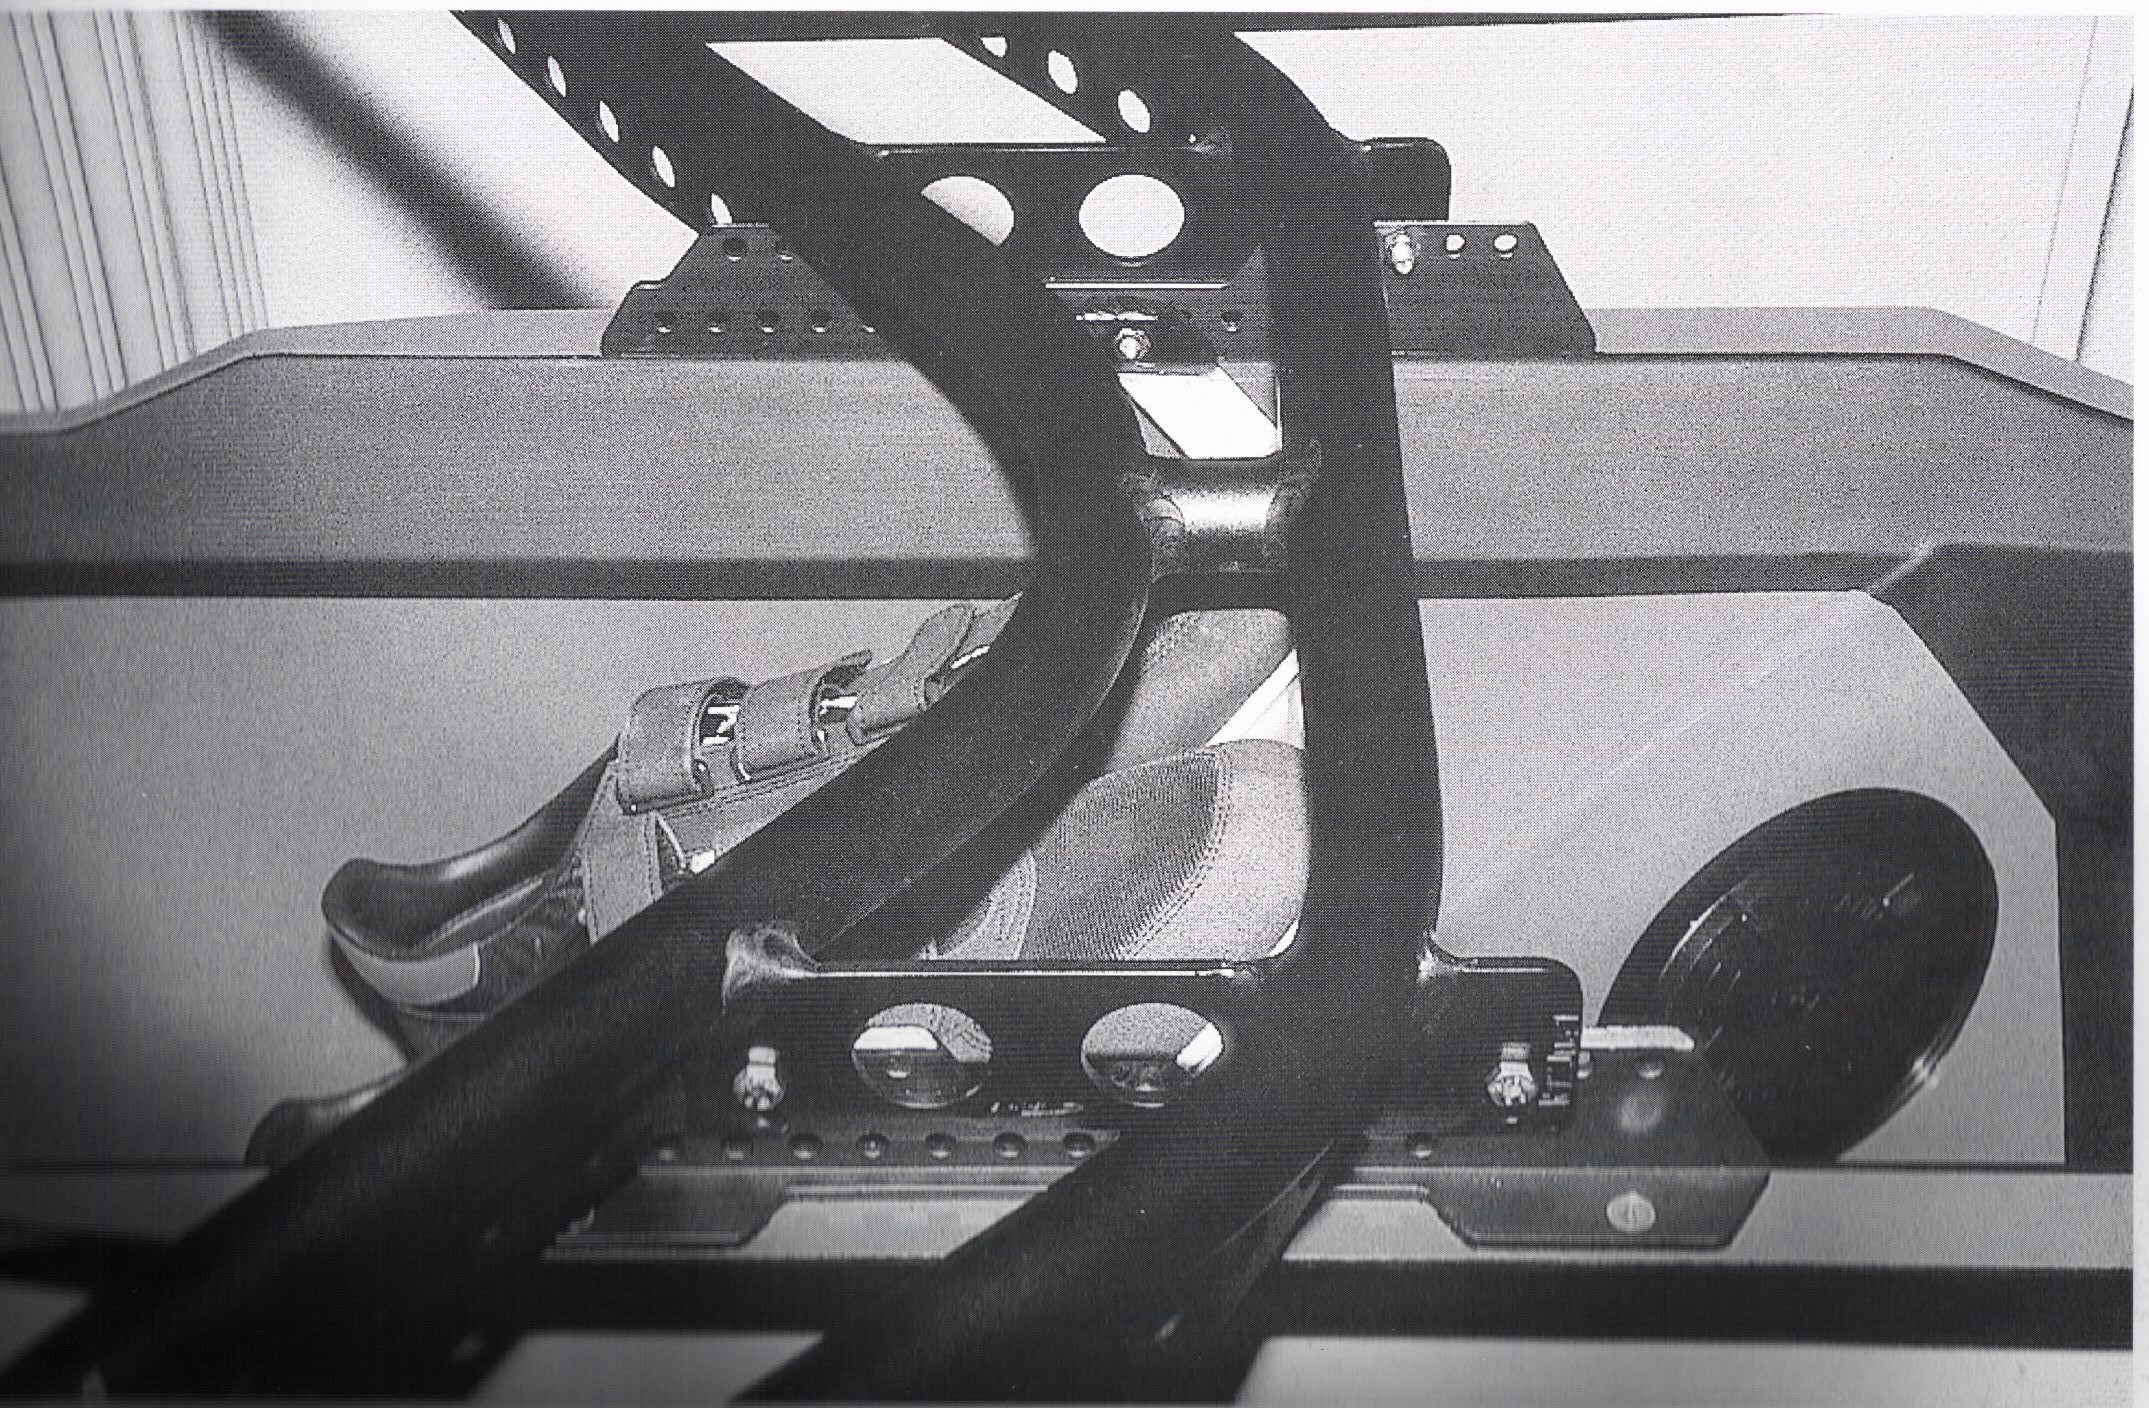 |
5.1 Measuring the Position of the Oarlock in Lengthways Direction of the Boat
Measuring the position of the oarlock with a long tape-meter. We usually start measuring from the bow-ball or number-holder. It is also possible from the stern or other fixed points. Most important is, that we adjust the riggers symmetrically in sculling-boats. If in team-boats the bow riggers are adjusted properly it is possible to continue from this rigger to the next. In sweeping-boats we get the desired position in conjunction to the main shoulder and on all places equal.
5.2 Changing the Rigger / Oarlock Lengthways the Boat
If the boat have a wing-rigger it is possible to correct in the position of the boat in the water by moving rigger and foot-stretcher.
- The bow of the boat is diving too deep in the layback position >>> move the rigger and the foot-stretcher towards the stern.
- The stern of the boat is diving too deep at the catch >>> move the rigger and the foot-stretcher towards the bow.
The decision about the position of the boat in the water is made by optical control during race-pace.
Tip: put good visible tape-marks at bow and stern on each side of the boat.
6. The Span
The span is defined as the horizontal distance from the middle of the boat to the middle of the oarlock-pin in sweeping-boats or in sculling-boats the distance from the middle of the oarlock-pin to the middle of the oarlock-pin on the opposite side
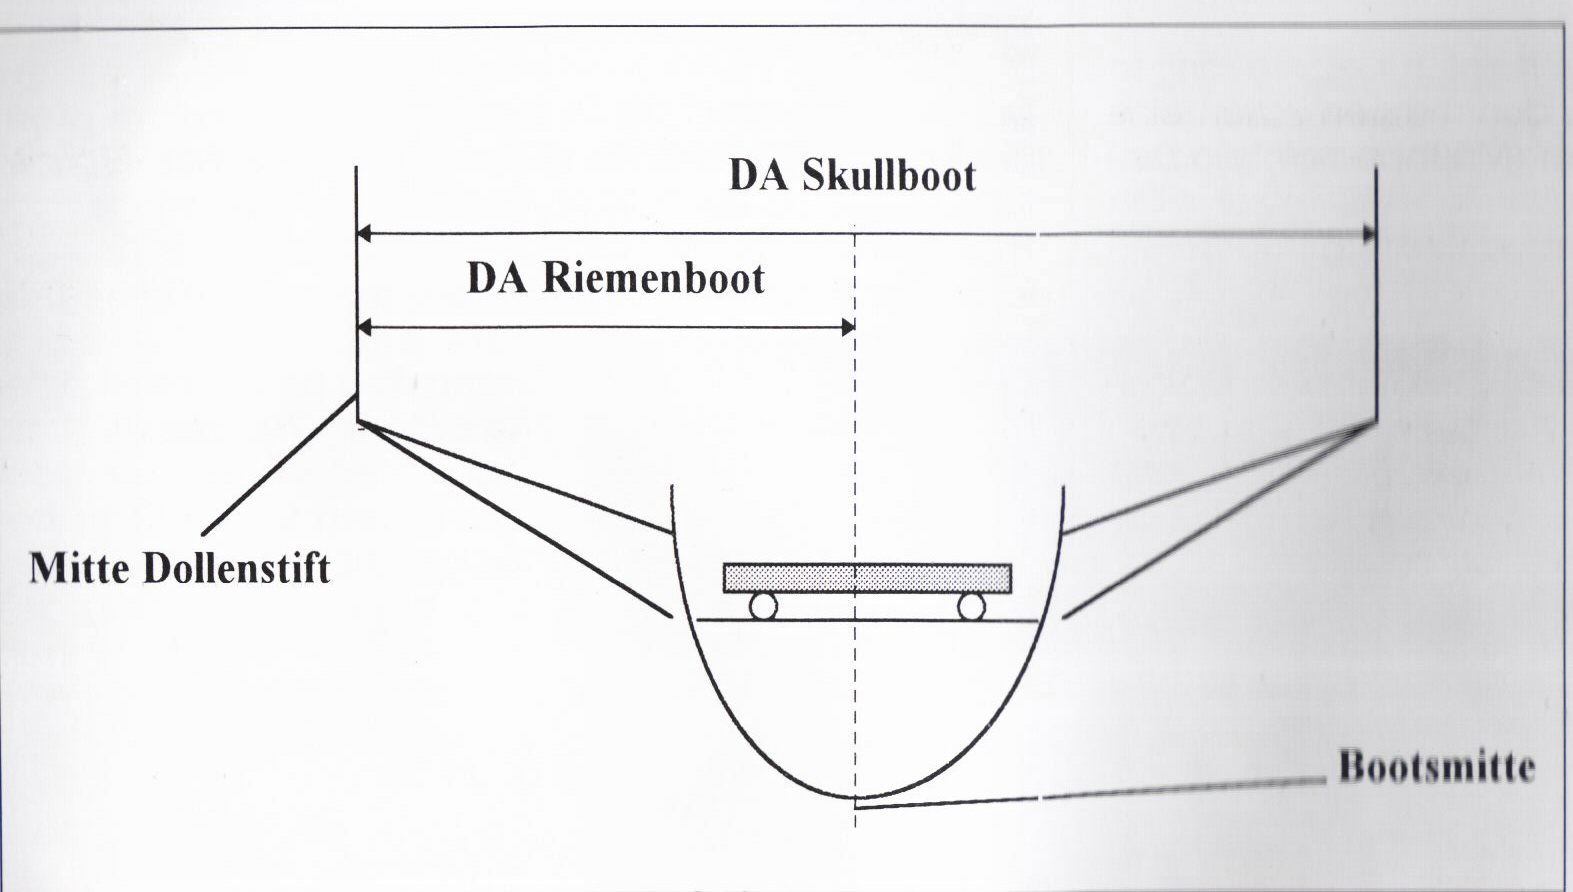
Pic.: Measurements to determine the Span
It defines the working condition, the stroke-length of the rower. The stroke-size is direct related to the anatomic and physiologic conditions of the athlete, so that the decision for the right span gets very important.
It is wrong to assume that a change of the span changes the resistance and lead to a harder stroke.
The target of a good team-technique is to achieve the most similar angle in catch- and layback-position.
We should not dare, if differences in the abilities of the athlete in Height, Arm-length, mobility, are recognized, to install different span at each place.
This way it is possible to equalize differences and can avoid extreme and uncomfortable stroke-positioning. The possibility of a wrong running sweeping-boat for that reason is non existent.
The use of smaller spans in bigger team-boats is explained with the higher speed of the movements in these classes. Higher frequencies and the resulting necessary higher speed of movement of each athlete lead to a missing catch-point at the front and at the finish-point at the end of the stroke. This means the real point of the catch moves further and further away from the best possible turning-point at the catch and the finish. The stroke gets shorter without knowing. We normally need in an eight a smaller span than in a pair to achieve a similar stroke-size. We find similar facts between quad and single.
6.1 Measuring and Adjusting the Span
The only needed tool id the meter-rule.
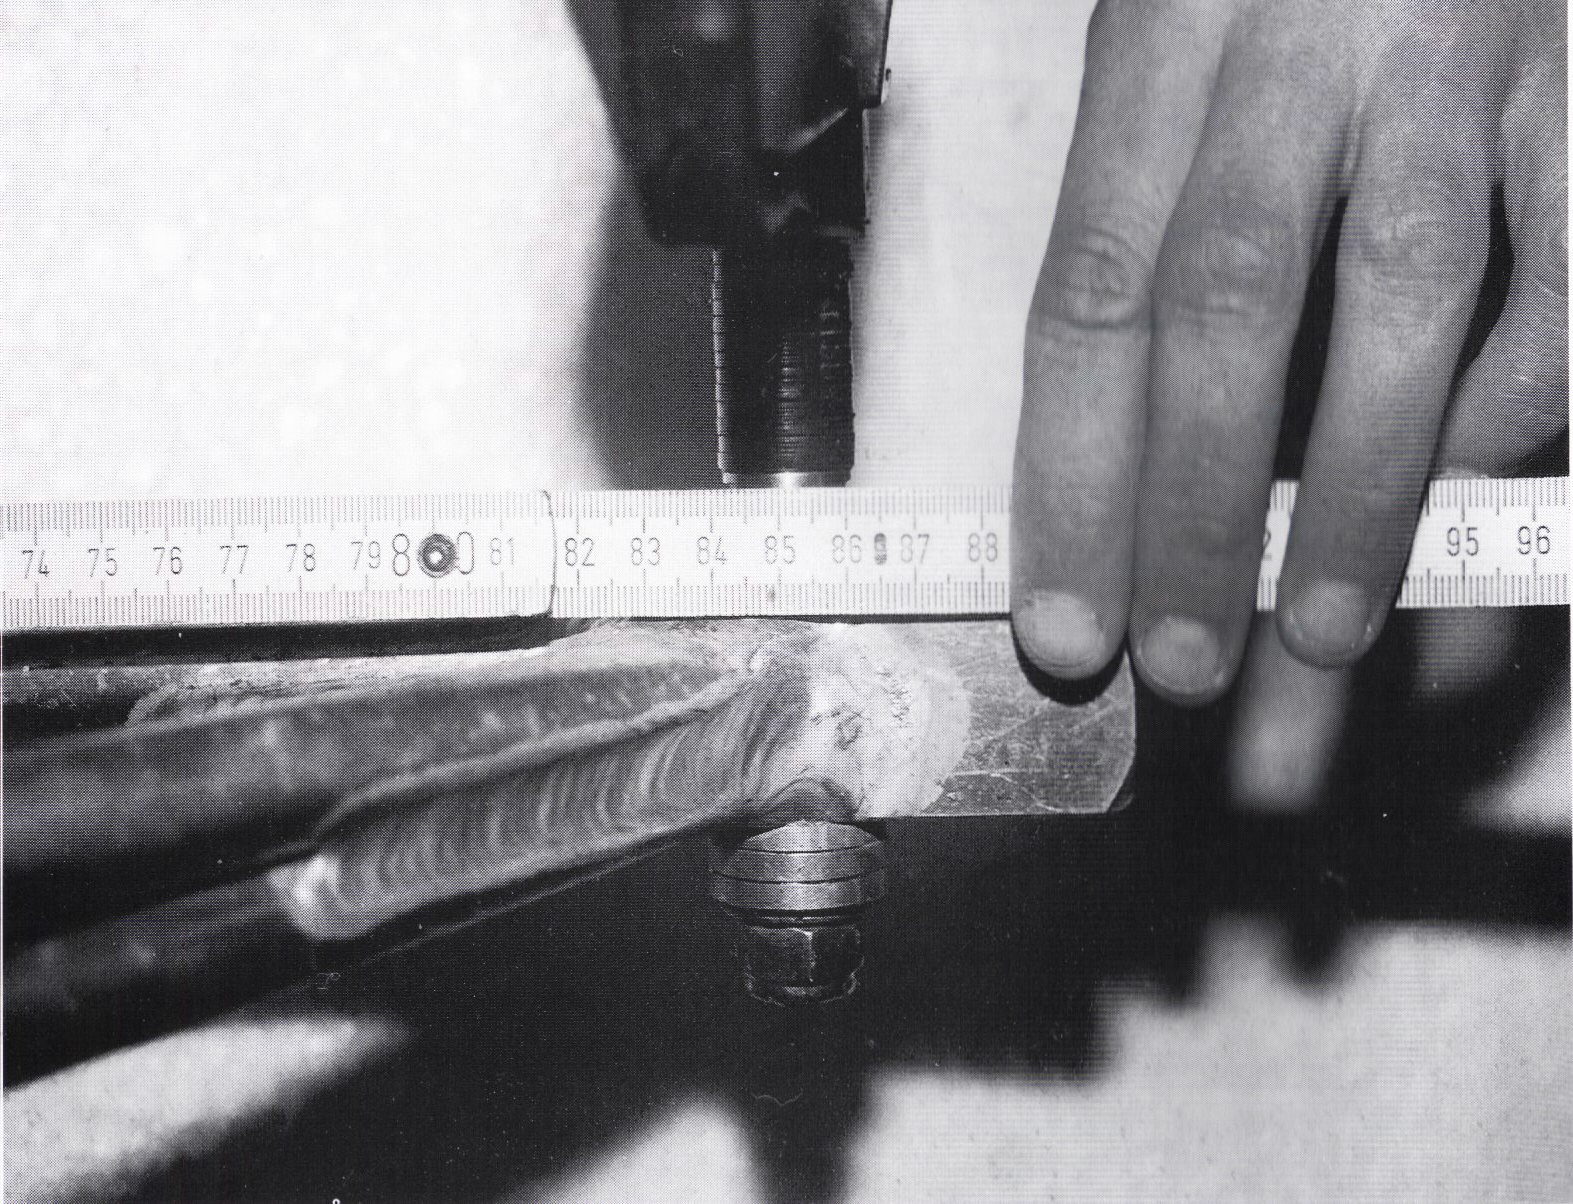
Pic.: measuring the span
6.1.1 Measuring with the Meter-Rule
Measure the boat-width, divided by 2= the half boat-width. Take the half boat-width put it on the outside edge of the washboard and measure from this point at the outside washboard to the middle of the oarlock-pin right over the rigger-head.
Control in sculling boats: Measure from the middle of one oarlock-pin to middle of the other oarlock-pin. (Always measure at the bottom of the pins)
Look for a fixed point inside the boat (e.g. slide, landing) and measure to the middle of both oarlock-pins (Starboard / Portside) to find out the symmetry.
7. The position of the Oarlock-Pin
The oarlock-pin should be adjusted in all directions vertical. Only this secures the same oarlock-angle (angle towards the stern) in all phases of the stroke. If the oarlock-pin is not adjusted properly it leads to steady change of the pitch during the stroke and so to problems with a correct rowing technique.
Proper use, maintenance and regular control helps to avoid problems with the oarlock-angle and pitch.
Occurring mistakes can be:
1) Inside-Pitch: Wrong position towards the boat
2) Outside-Pitch: Wrong position towards the water
3) Front-Pitch: Wrong position towards the stern
4) Back-Pitch: Wrong position towards the bow
How these mistakes, that can occur also in combination (1+3 / 1+4 / 2+3 / 2+4), act concrete on the pitch of the oar inside the water should be explained in a few simple examples:
What happens during the drive if the pitch is measured right as 4° at the orthogonal position, but the pitch of the oarlock has a mistake of 1,5°?
Catch at 60° / Finish at 30°
|
It can be seen which effects a wrong position of the oarlock-pin has. During the stroke changing situations occur according this table. Unclean movements of the blade in the water are often a result of those mistakes.
7.1 Proofing the Positioning of the Oarlock-Pin
|
There are two possibilities to proof if the oarlock-pin is in a vertical position:
|
7.1.1 Measuring with Oarlock-Pin Measuring Device
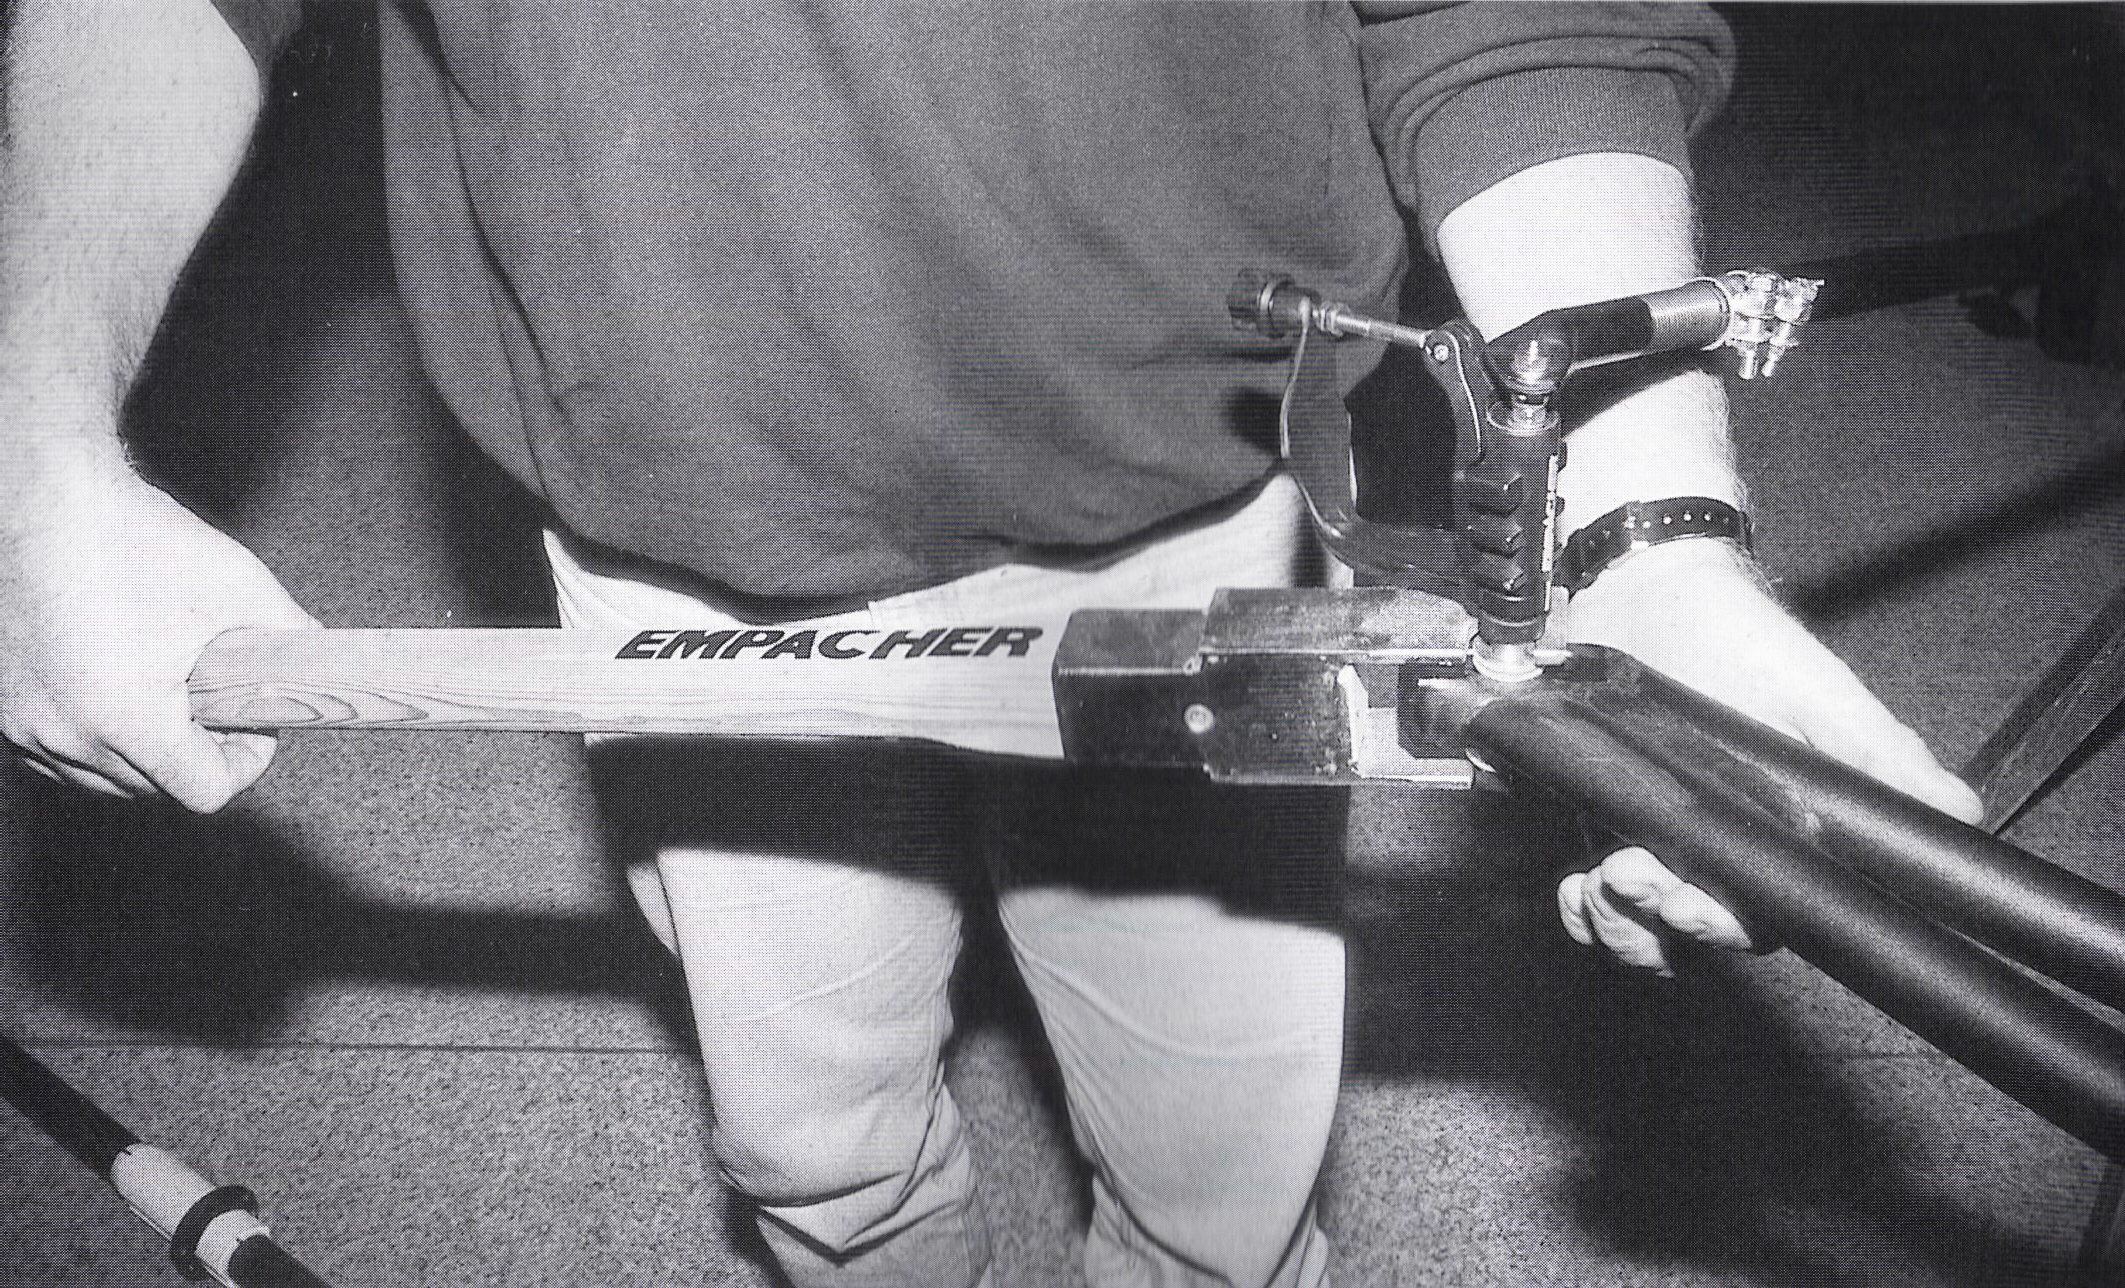
It should be started to check the inside-/outside-pitch. The boat has to be put in an exact balance level (spirit-level on the slides) and be fixed in all directions. The OPMD has to be calibrated and fit onto the oarlock-pin. Turn the OPMD 90Ί towards the boat. If everything is checked or adjusted continue with the check of the pitch alongside the boat (front- /back-pitch). Calibrate the OPMD on the landing or keel of the boat. Fit the OPMD onto the oarlock-pin and turn the tool parallel to the boat.
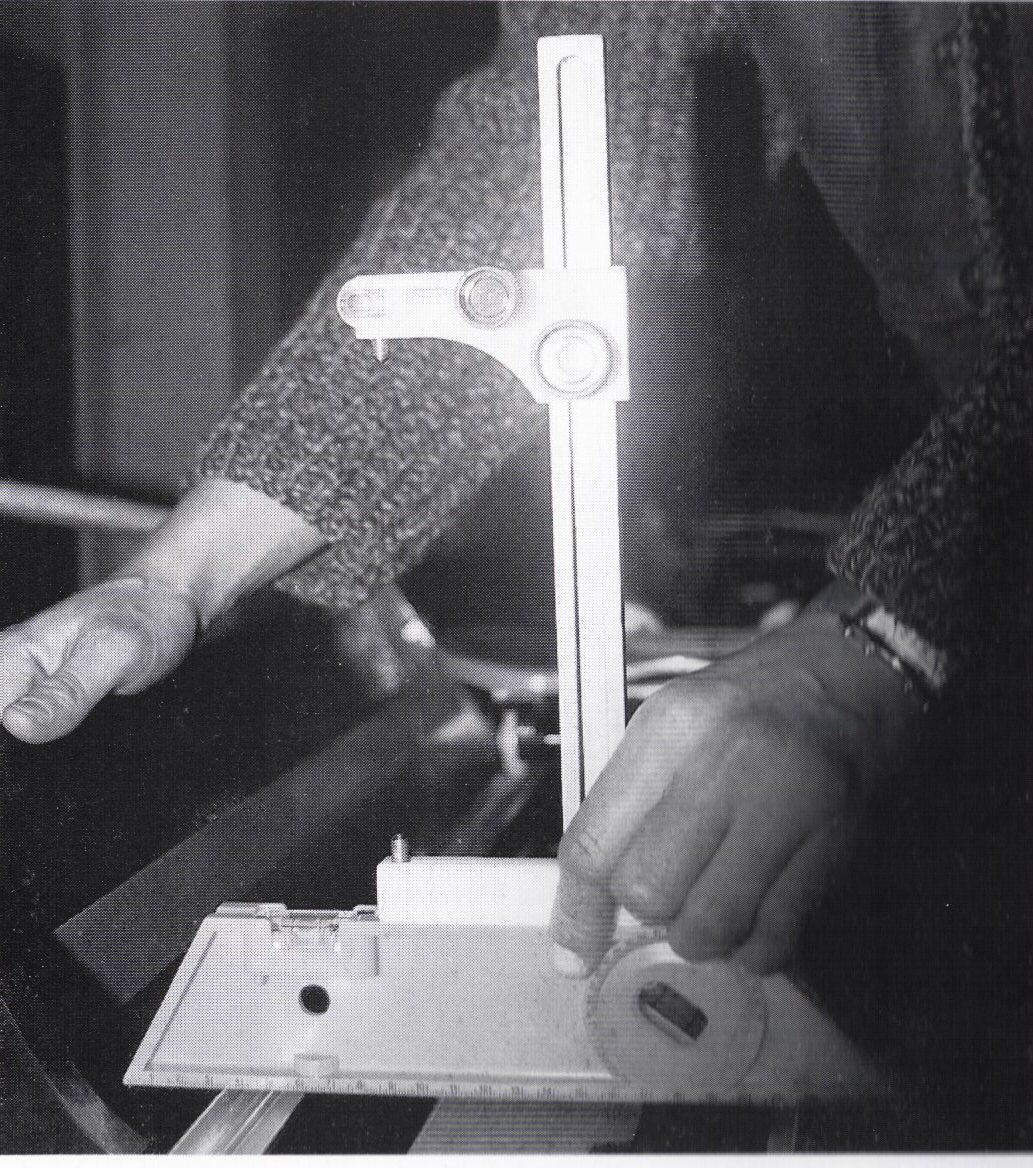
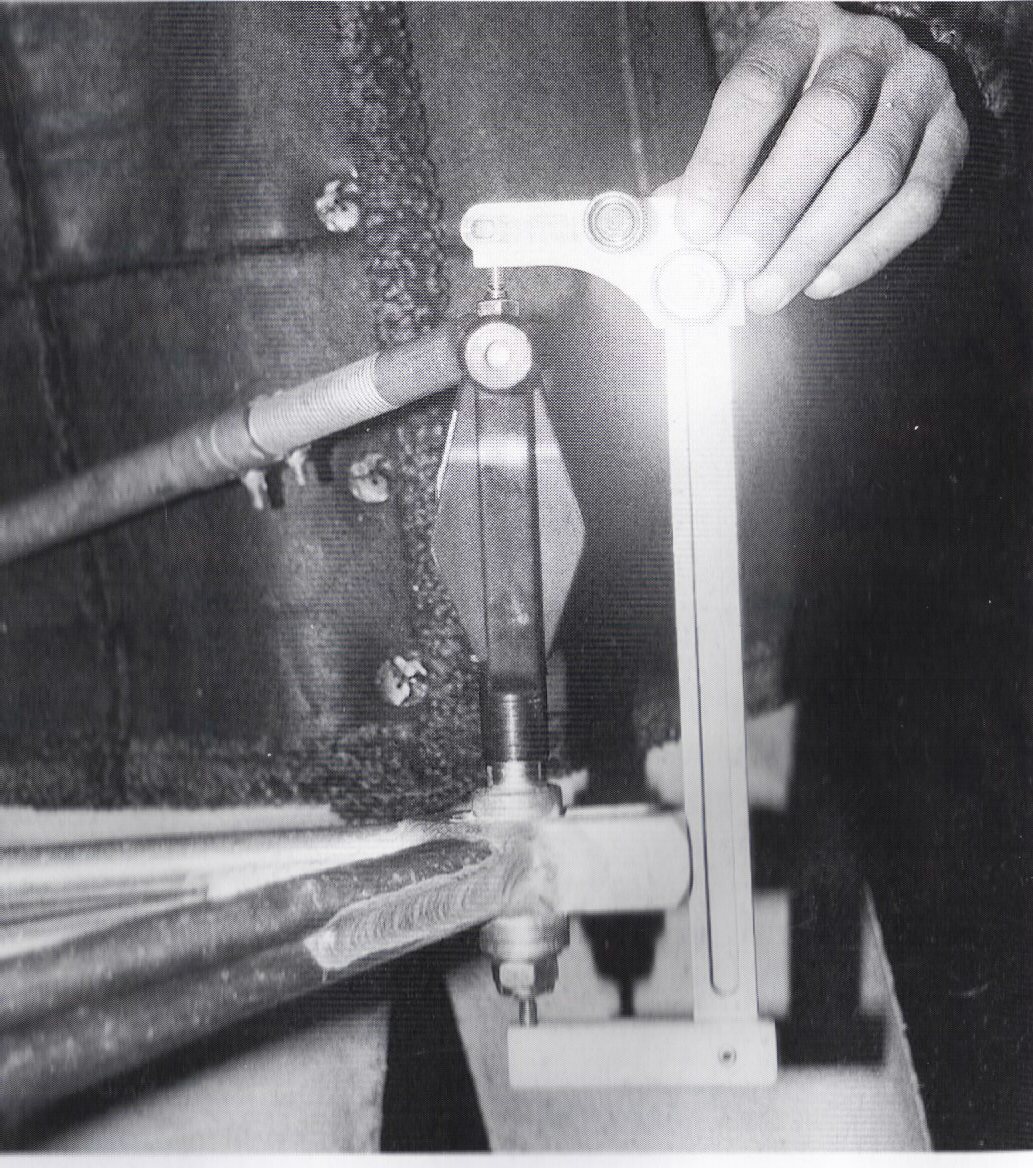
Pic.: Calibrating of the OPMD Pic.: Measuring with the OPMD
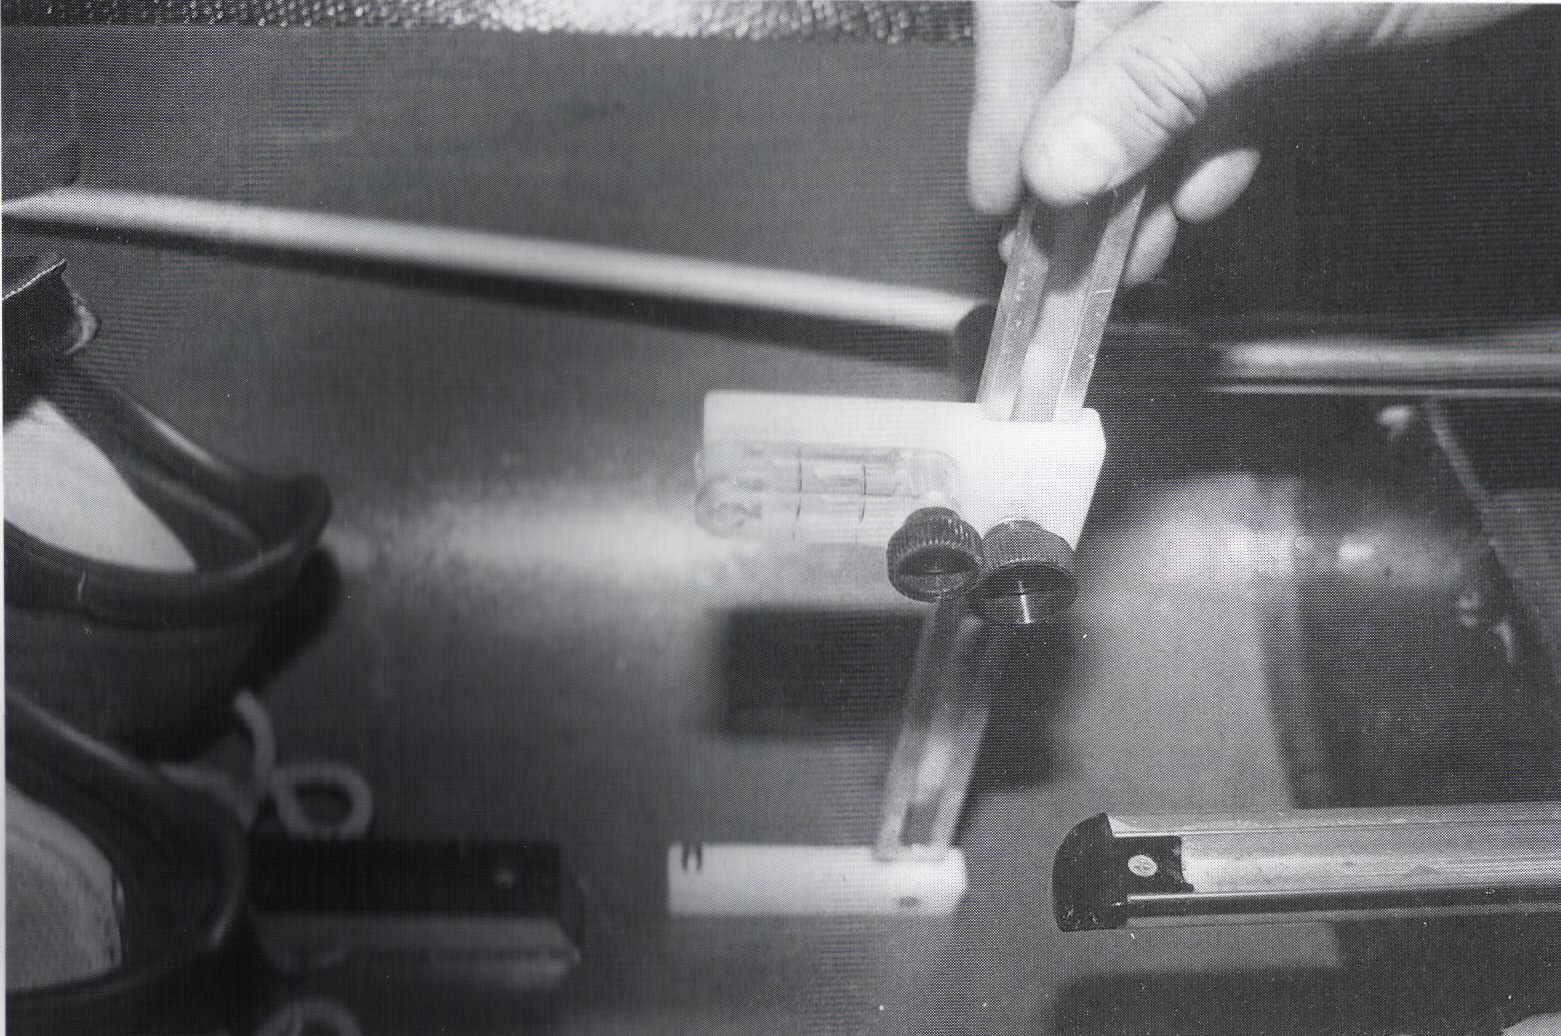
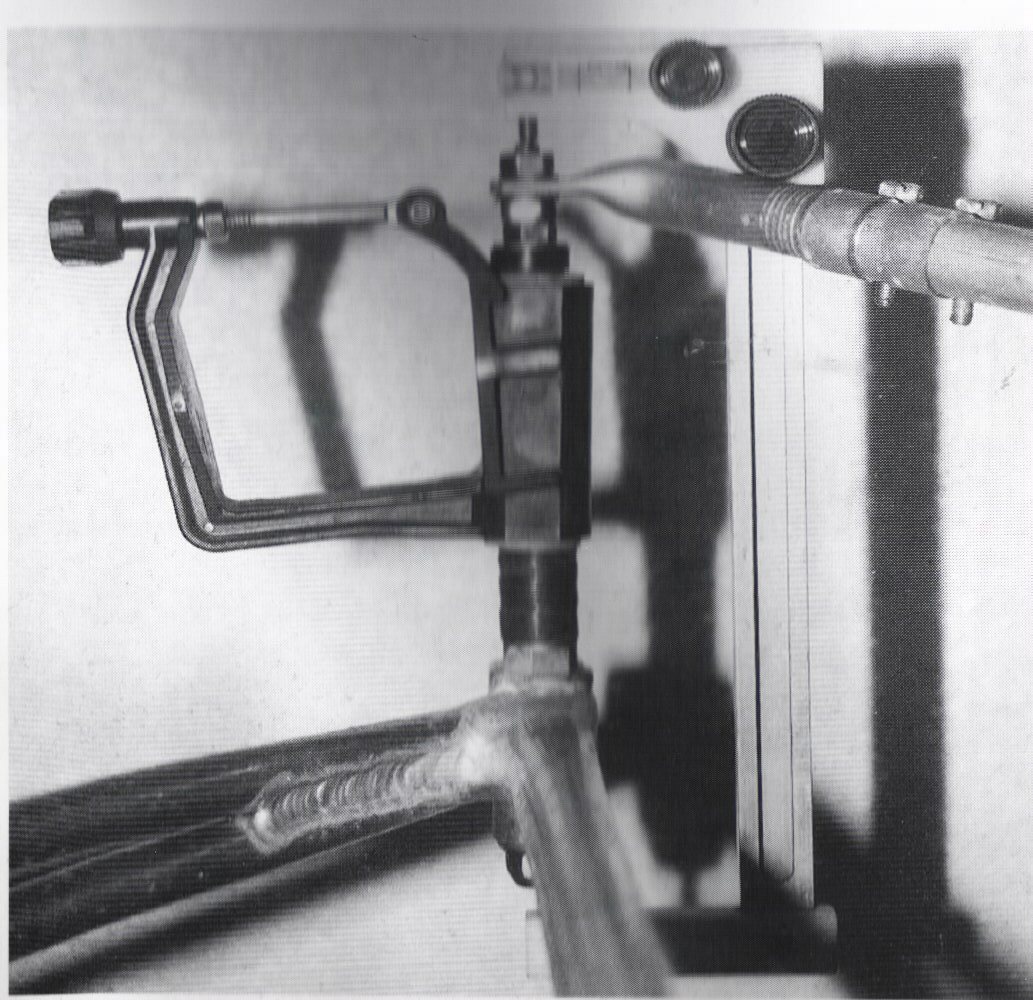
Pic.: Calibrating of the OPMD parallel to the boat Pic.: Measuring with the OPMD parallel to the boat
7.1.2 Measuring with the Pitch-Meter
First the boat has to be fixed and balanced in all directions. This is followed by the calibration of the pitch-meter parallel to the boat on gunwhale, landing or keel. Then we can use the pitch-meter to measure either the pin or the oarlock in all directions. The result has to be the same in all positions.
If this is not the case the Oarlock-Pin has to be adjusted with the Persuader
 |
7.2 Adjusting the Oarlock-Pin
The boat has to be fixed by a second person. The rigger/has to be bended in exact direction parallel or 90Ί to the boat only.
8. The Pitch of Sculling and Sweeping Oars
The pitch of the oar effects the position of the blade in the water. The right pitch is required for an effective blade-work. It enables a good catch and easy extraction. Too much pitch lets the blade slip out of the water. To less pitch lets the blade dive too deep.
Usually the oars have a pitch of 1Ί- 3Ί to achieve an overall pitch of 1Ί- 4Ί. Occasionally a pair of oars might have different pitches.
To adjust a correct overall-pitch it is important to know the pitch of each single oar (sculling/sweeping)
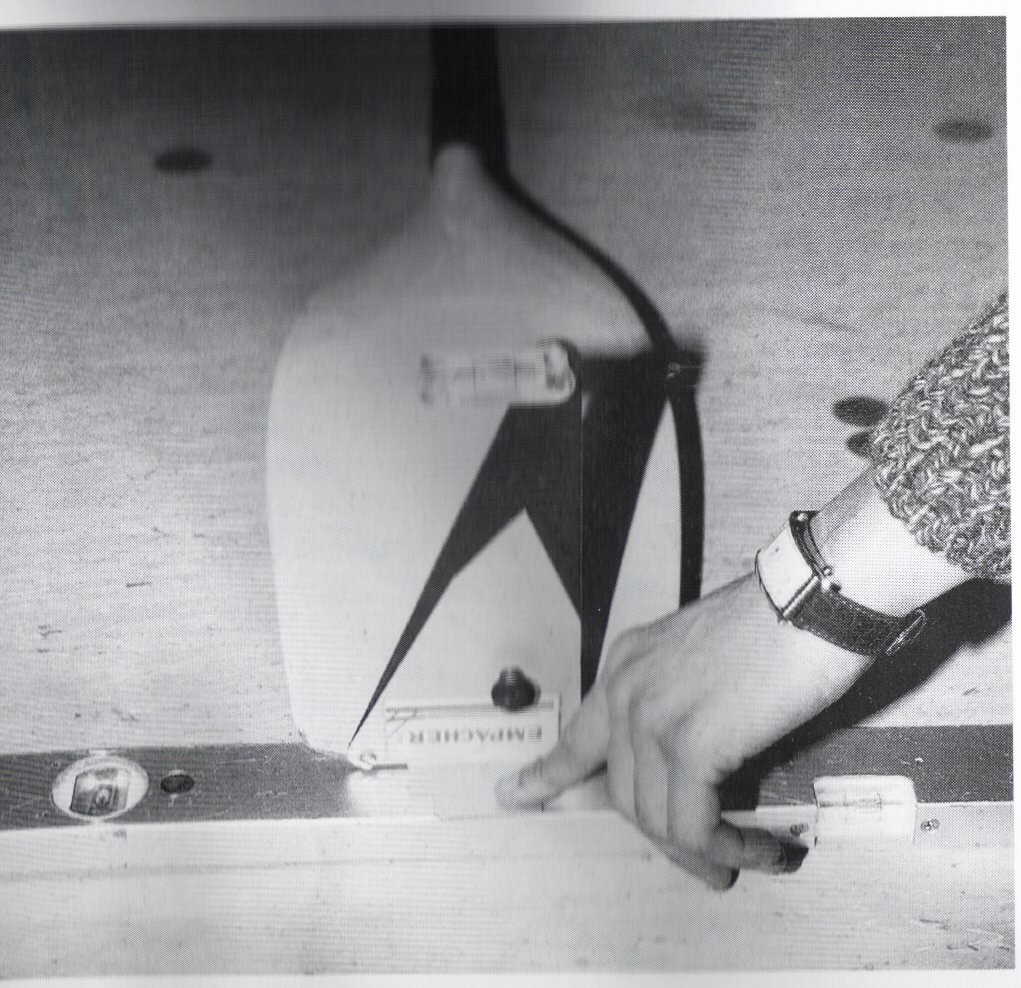
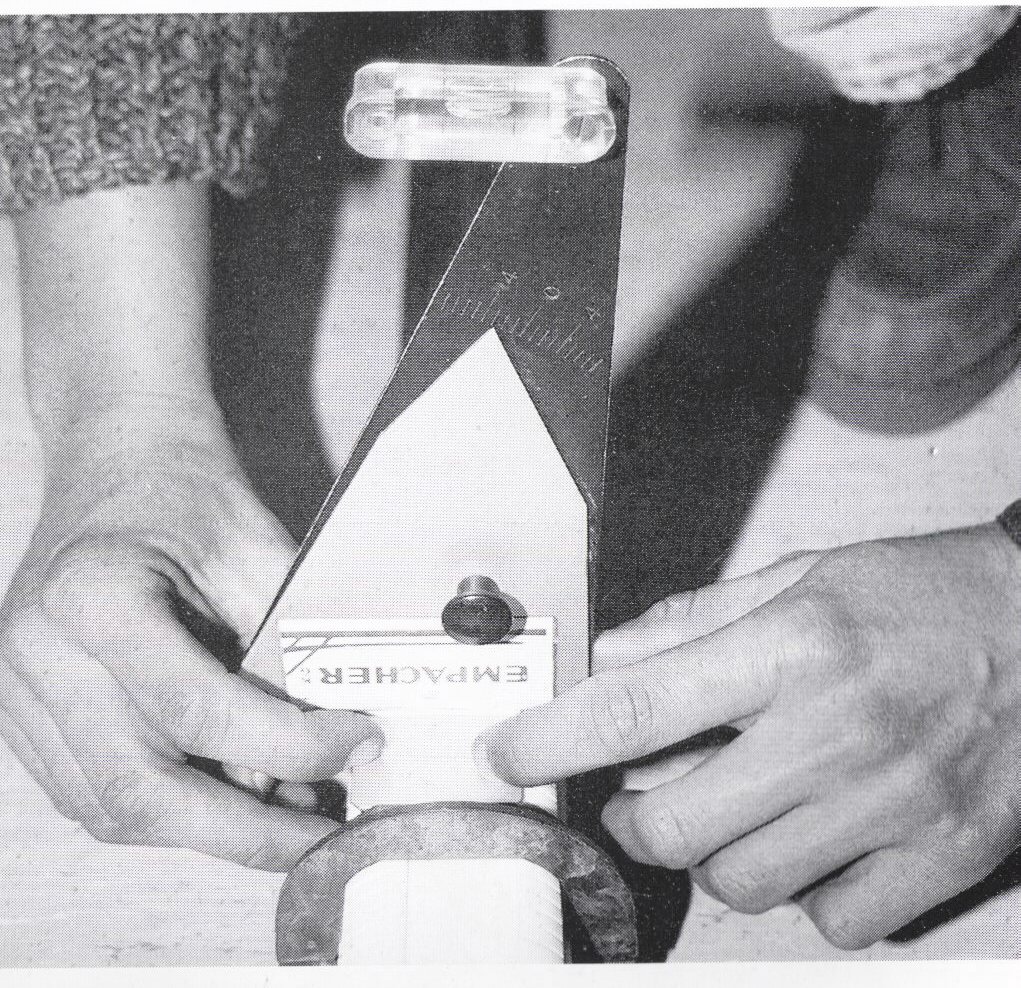
Pic.: calibration of the pitch-meter before measuring the pitch Pic.: measuring the pitch of the oar at the sleeve
8.1 Measuring the Pitch at Sculling and Sweeping Oars
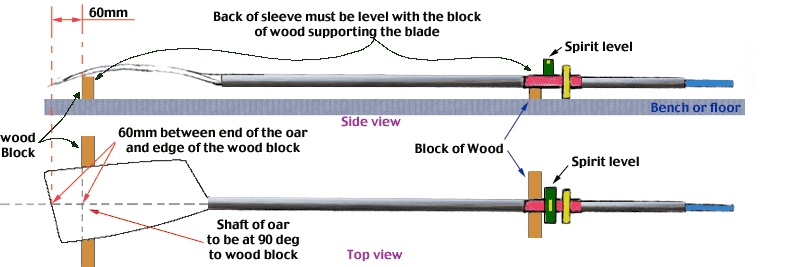
Find an even place and put the blade in a horizontal position. Is it not possible to find a useful place it is necessary to use a well placed water-level. Place the pitch-meter upside on the water-level and calibrate the spirit-level on 0Ί. The shown result on the display is the pitch of the oar (positive/active). Never turn the direction of the pitch-meter!
At the big-blade the corrected line for the measurement at the top of the blade is 90Ί to the loom. See Pictures below.
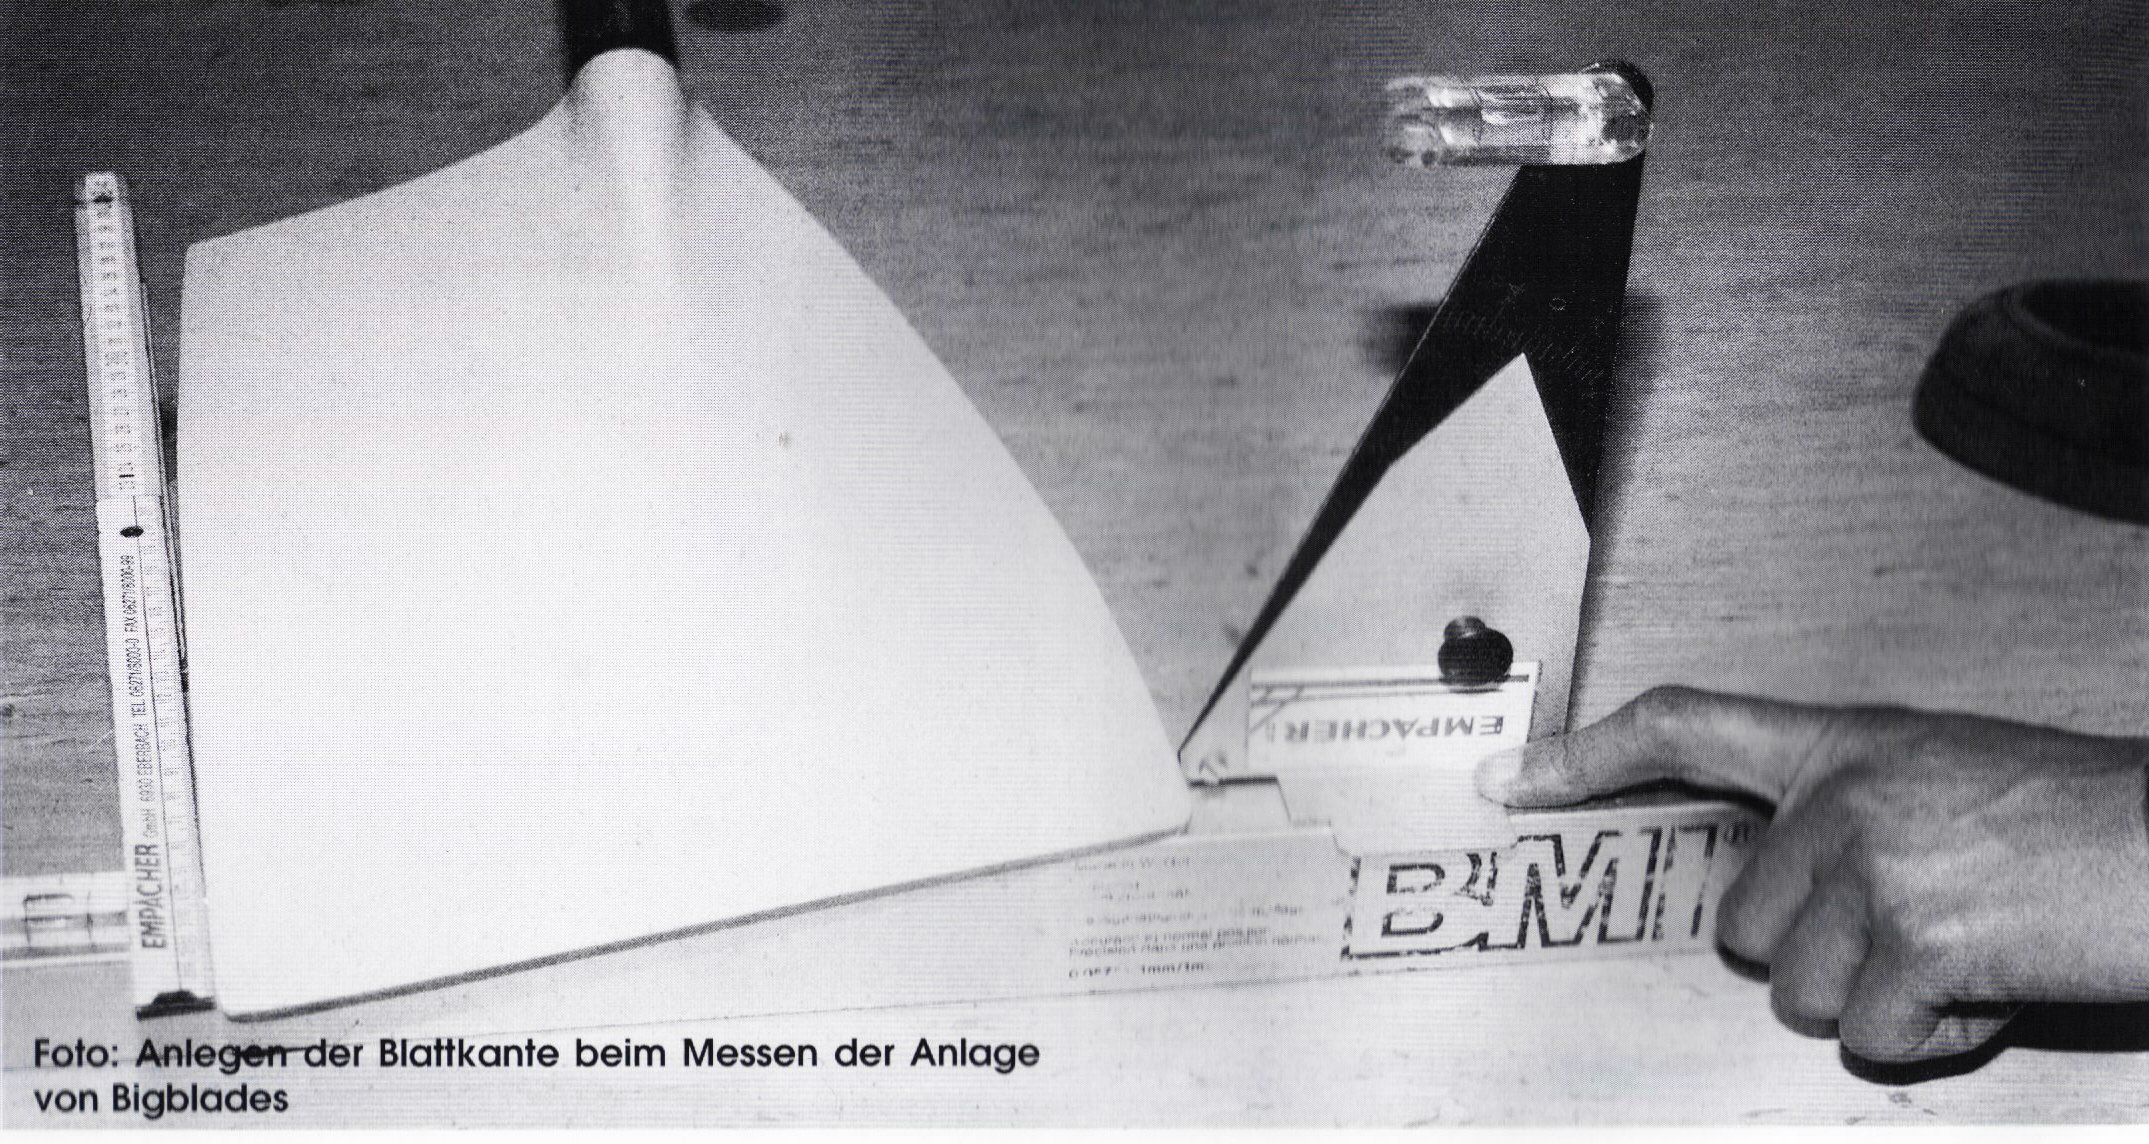
e.g. Empacher / Croker
9. The Pitch of the Oarlock
Analog to sculling and sweeping oar the oarlock has its pitch. This pitch results out of the pitch of the oar.
Pitch of the Oar + Oarlock-Pitch = Overall-Pitch/Pitch at the Blade
Note: always adjust the Oarlock-Pin on 0Ί as seen in point 7. This enables the easy use of marked eccentric inserts (Insert Oarlock). Check the result nevertheless.
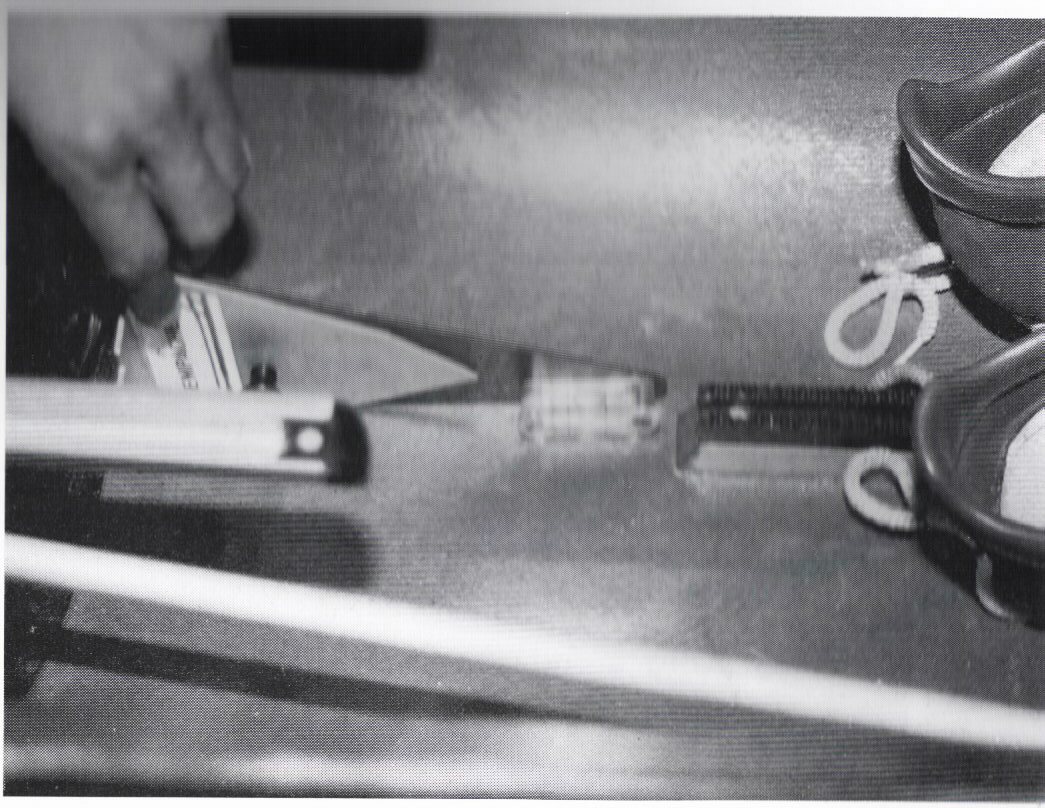
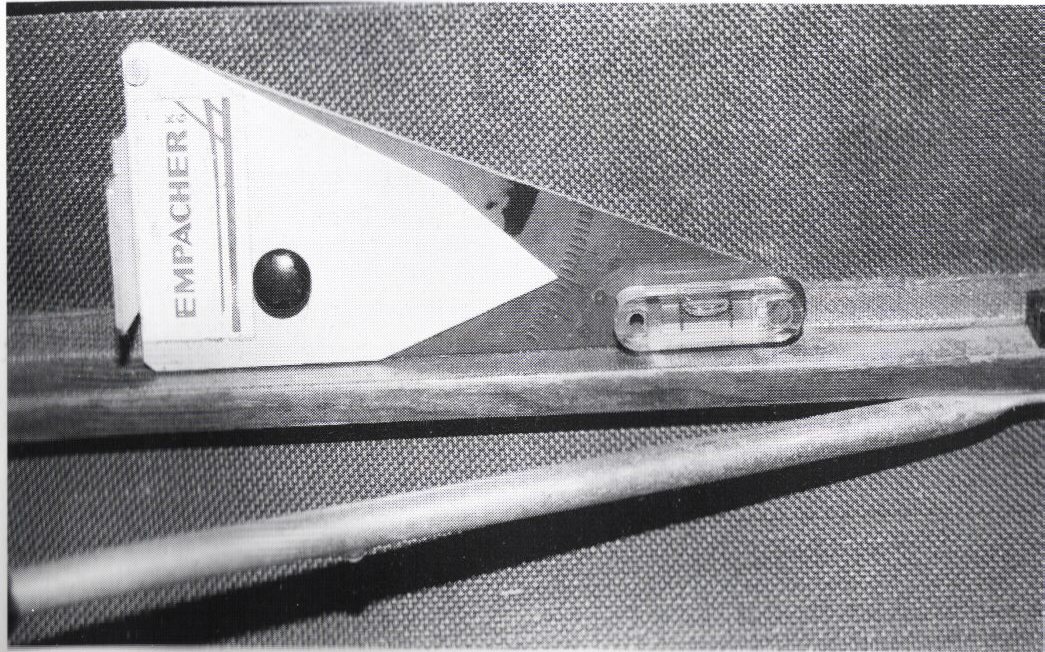
pic.: calibration of the pitch-meter on the keel pic.: calibration of the pitch-meter on the landing
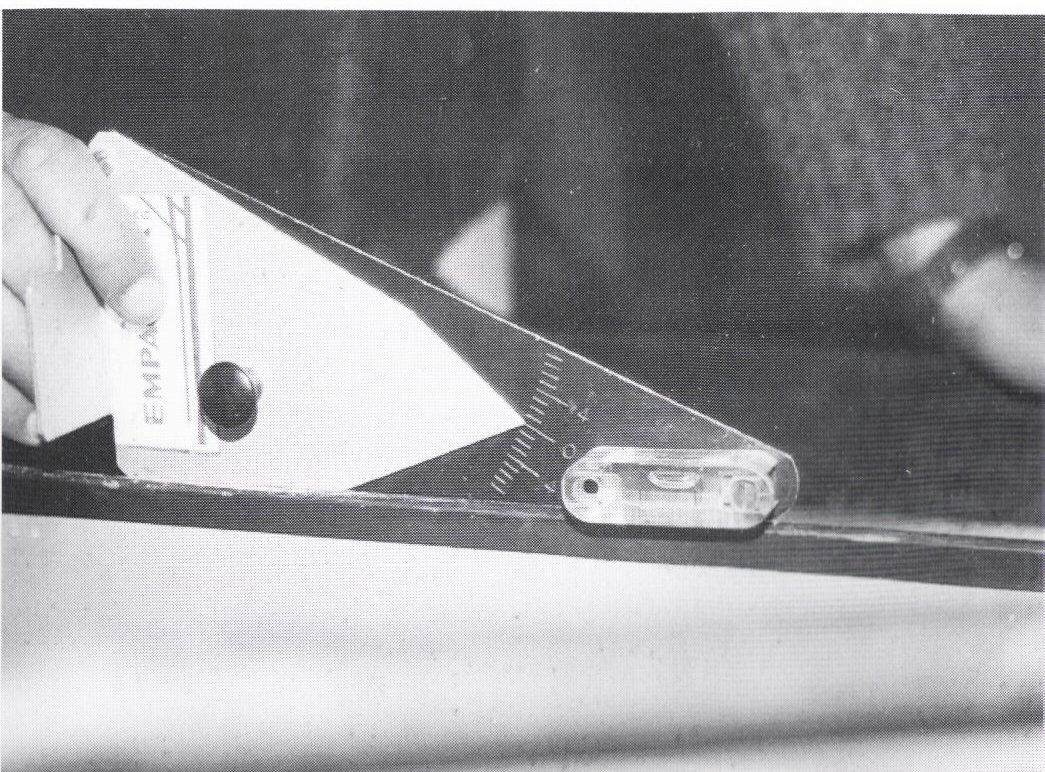
pic.: calibration of the pitch-meter on the gunwhale
9.1 Measuring the Oarlock-Pitch with the Pitch-Meter
First the pitch-meter has to be calibrated on the keel, the landing or the gunwhale of the boat. Place the pitch-meter against the oarlock area at the pin. Check the spirit-level and see the result at the display
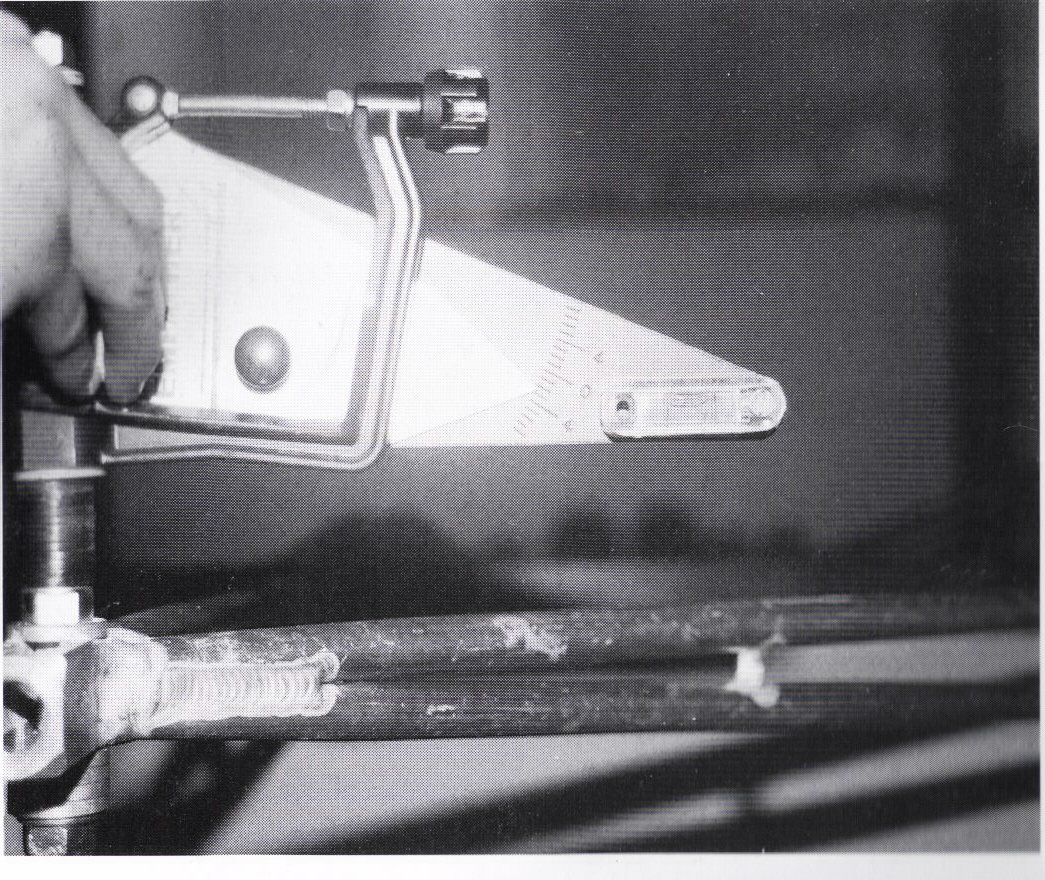
pic.: measuring with the pitch-meter
9.2 Changing the Oarlock-Pitch
The Insert-Oarlock 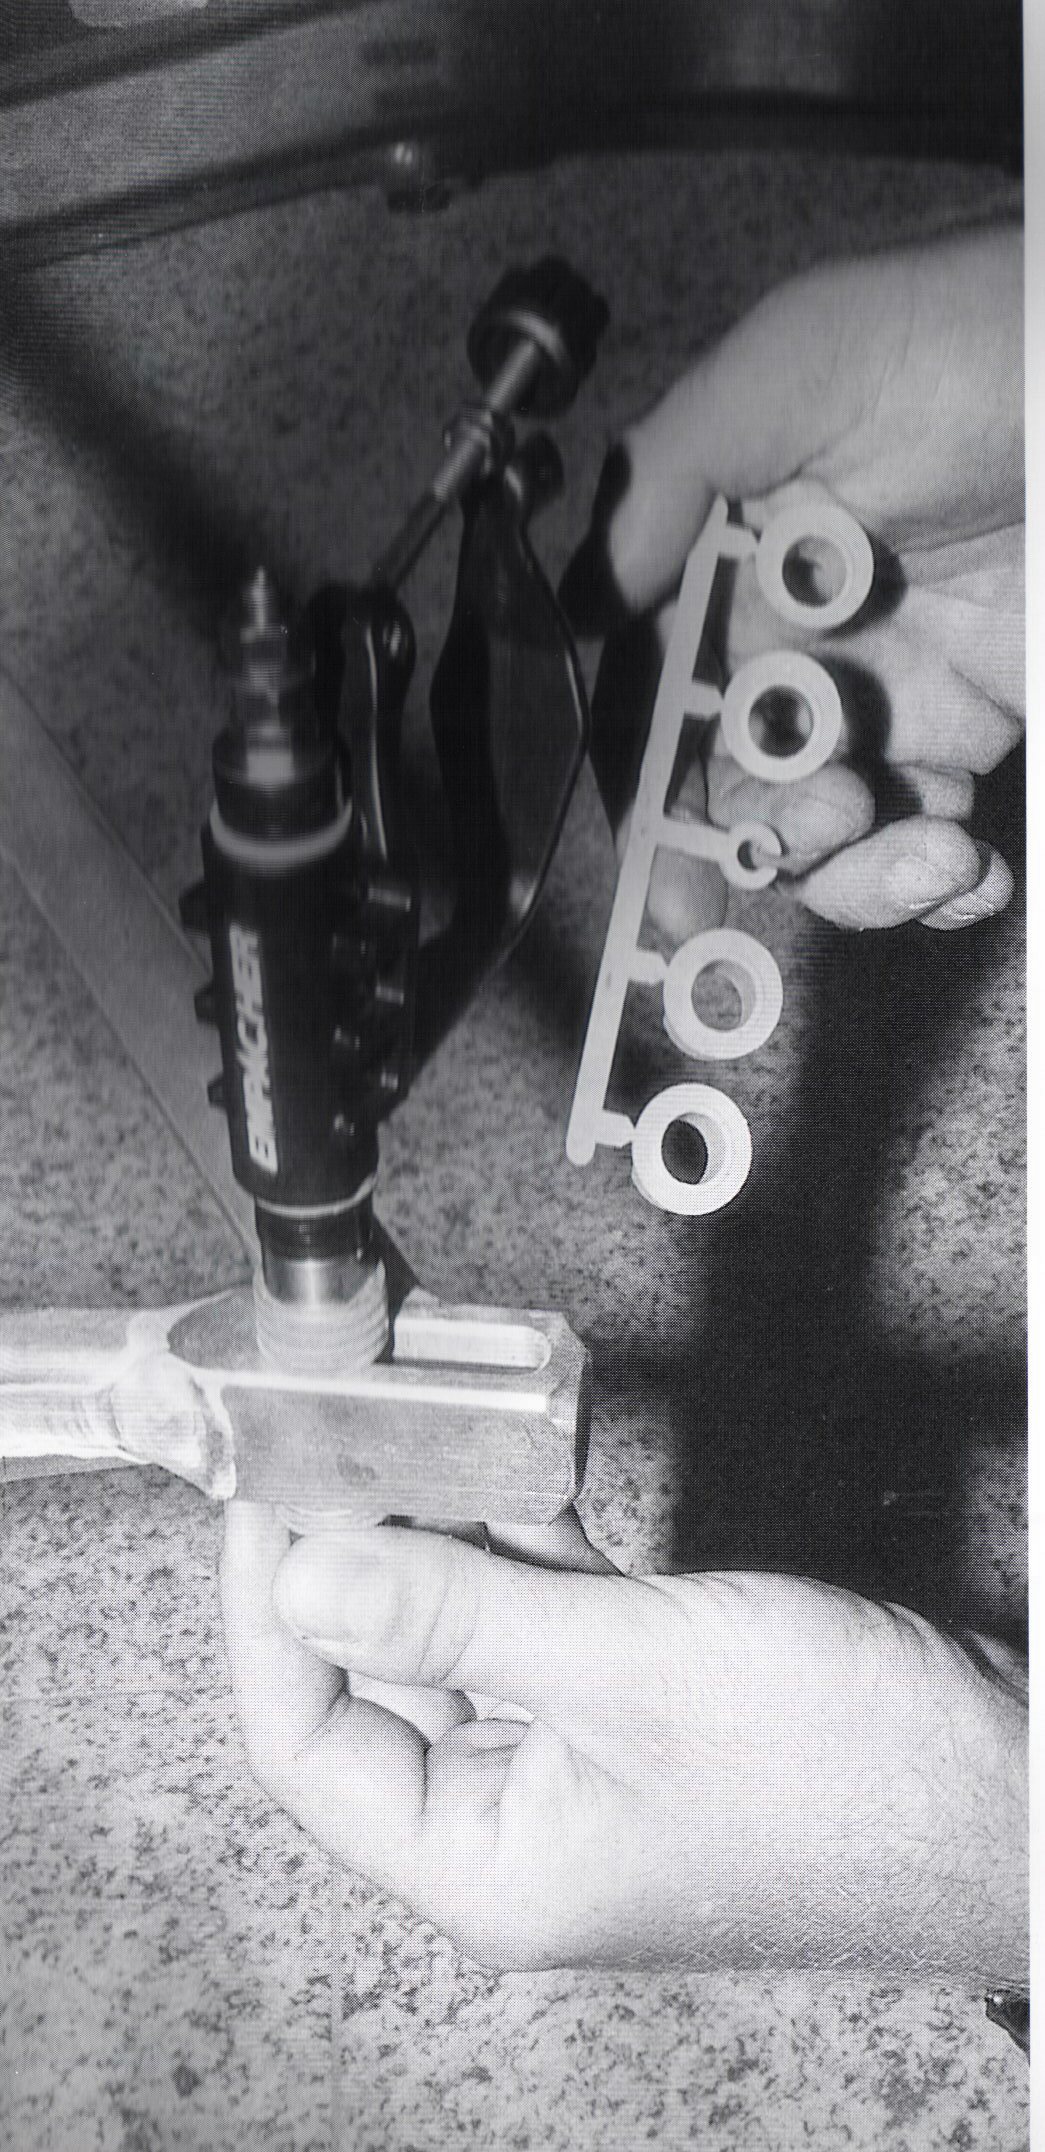
The insert-oarlock uses excentric inserts at the top and the bottom to adjust the pitch.
The number shown on the insert facing towards the oarlock-pin marks the pitch.
The following table shows the adjustment possibilities with these oarlock-inserts.
|
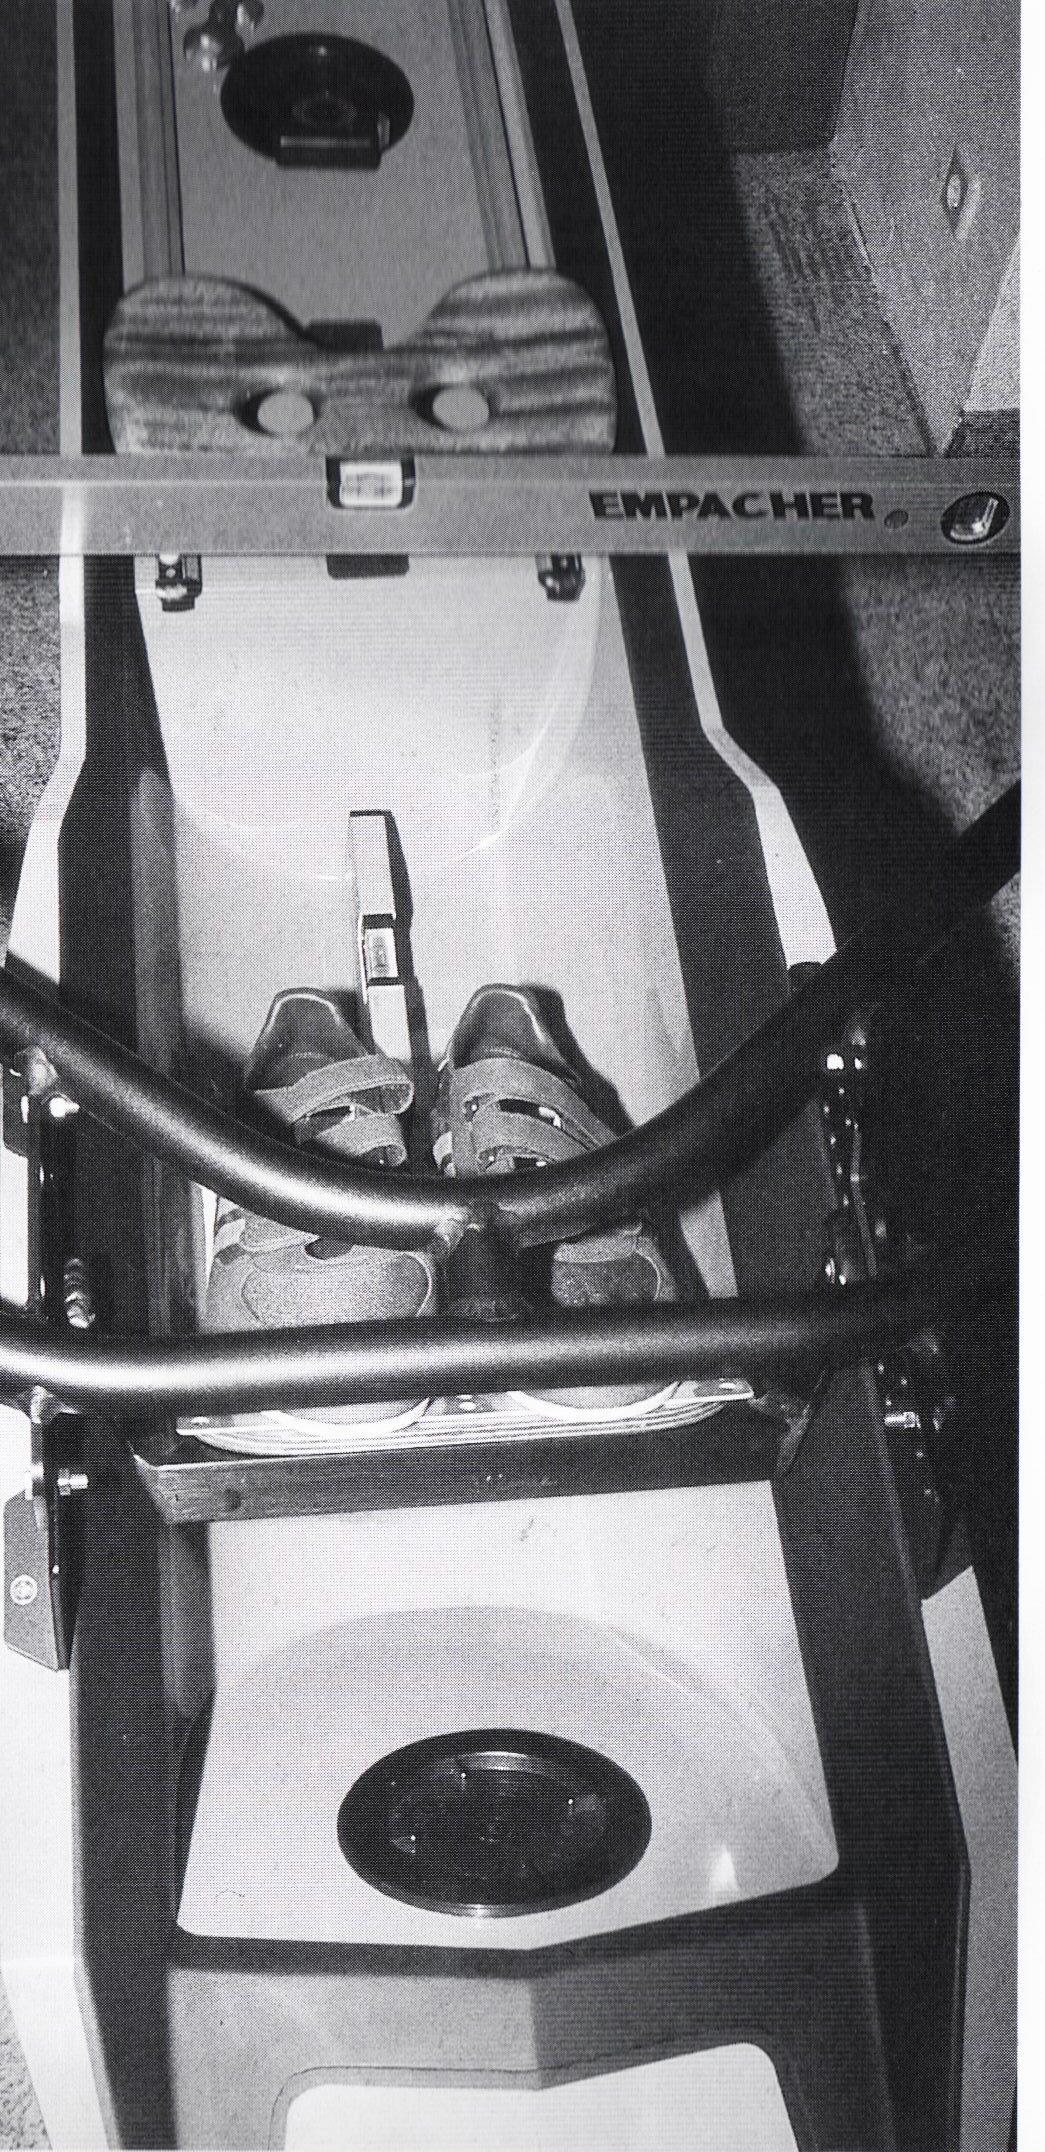
Required! - Complete calibration of the boat in all horizontal directions (see Pic. below)
 |
10. The Slide
The position of the slide is responsible for comfortable rowing without hitting the front- or backstops.
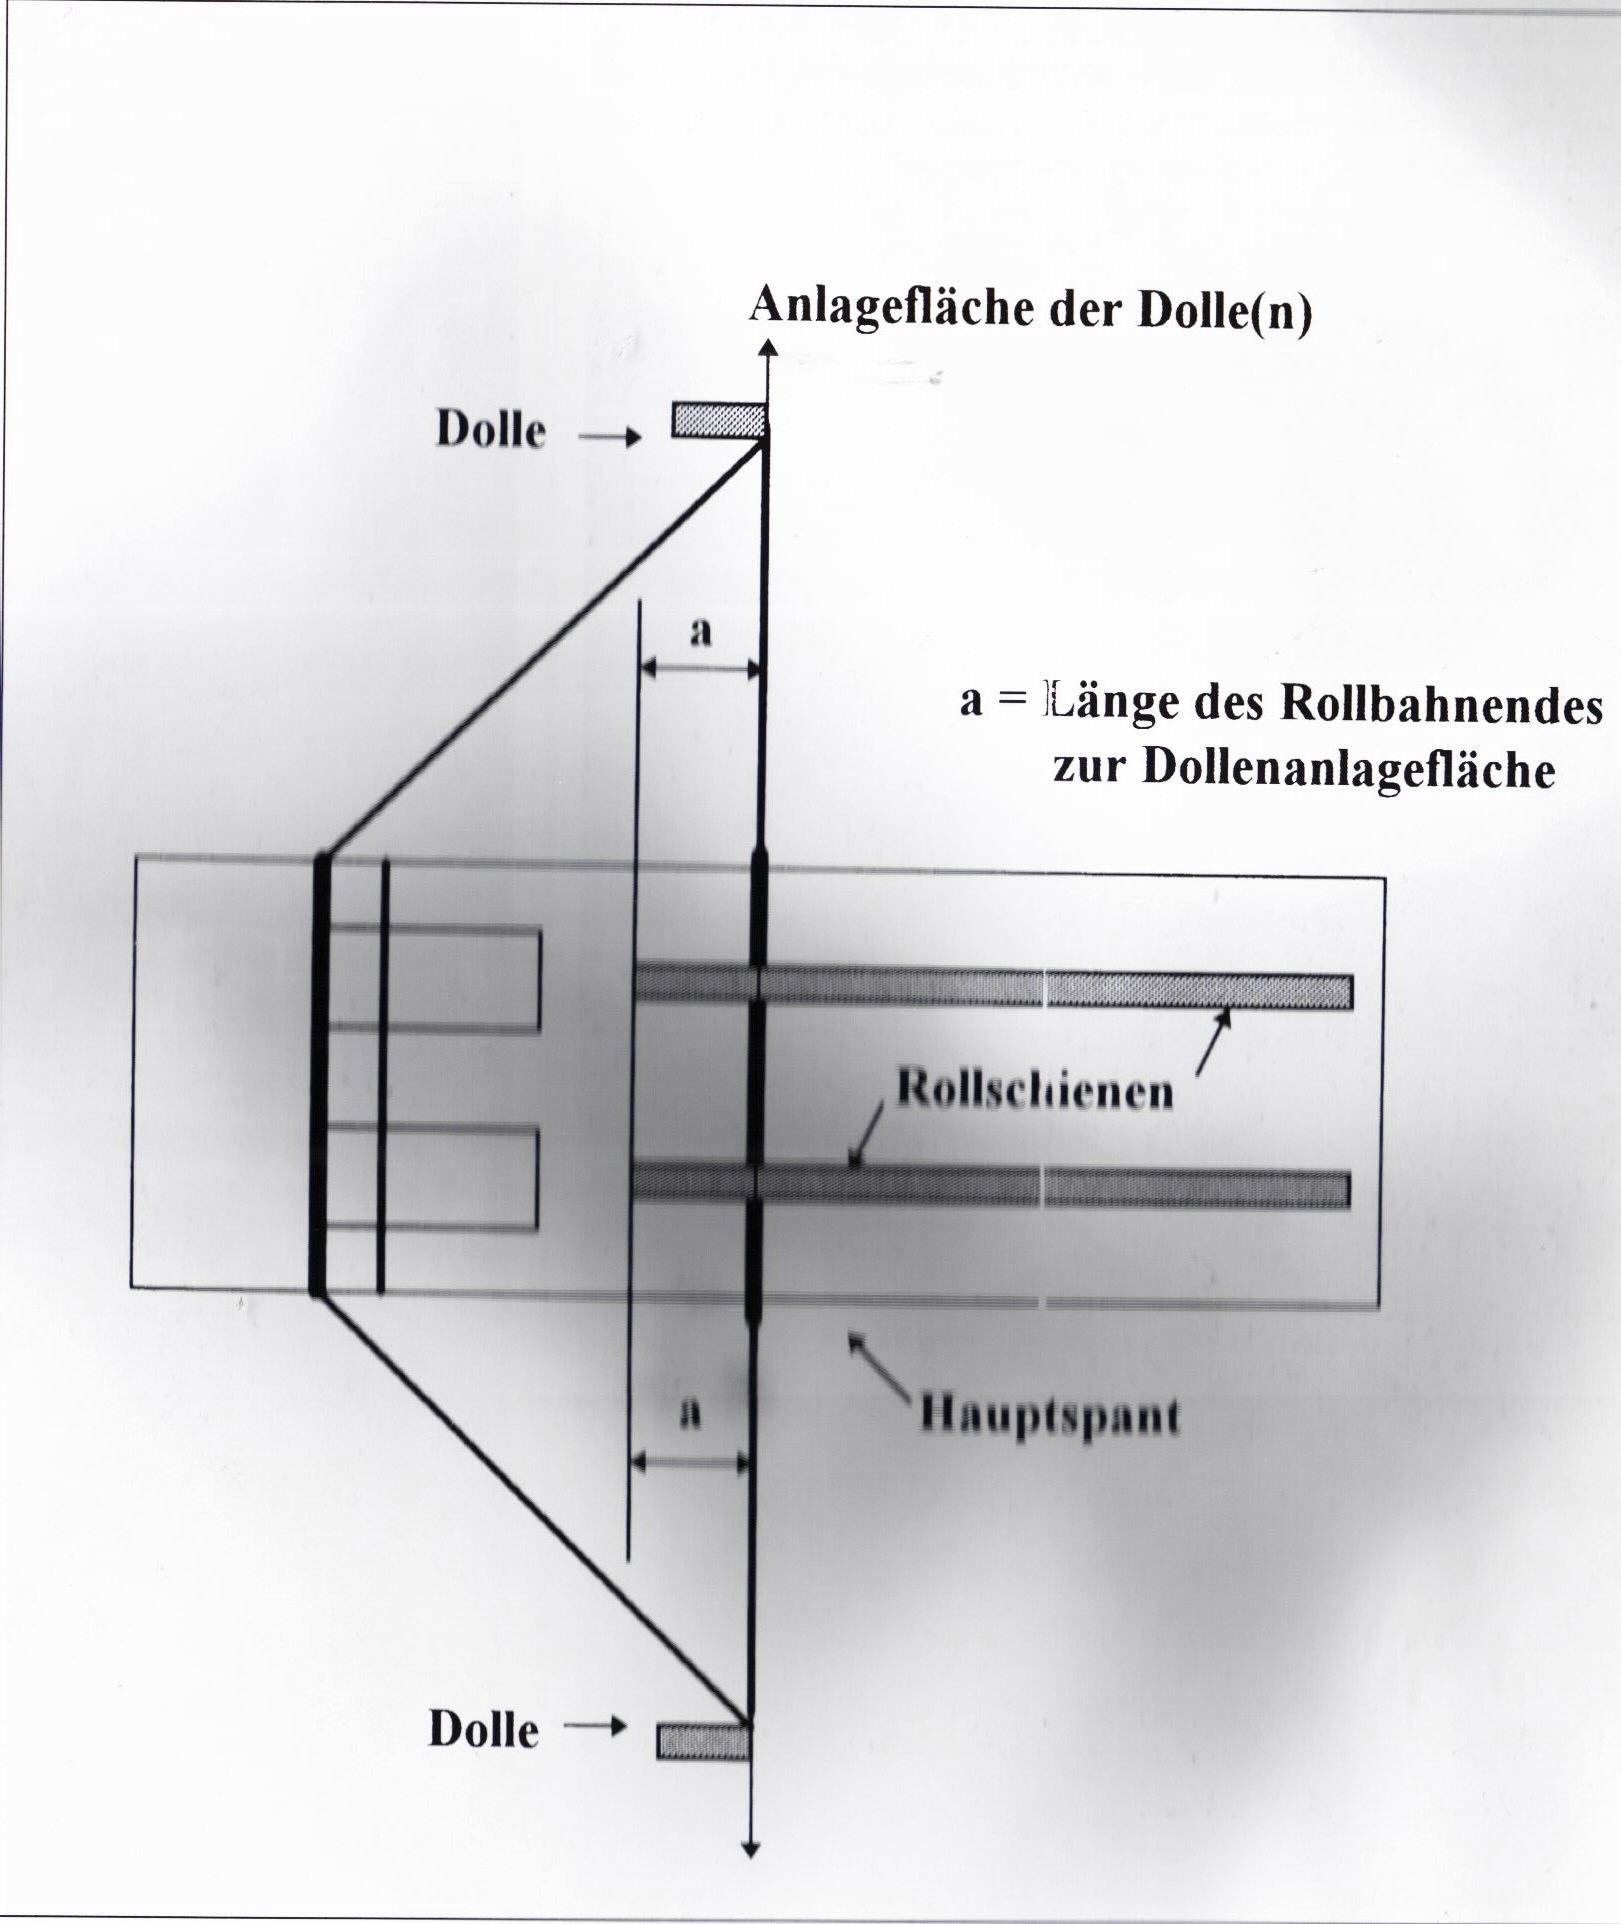 The slides define the working-space of the rower in front of the oarlocks. This is a very important fact, the work in front of the oarlock effects the force and the length of the stroke directly.
Recommended Measurement for the Working-Space: ~ 12cm towards the stern of the boat (7 16cm)
10.1 Determination of the Position of theSlides towards the Oarlock-Pin 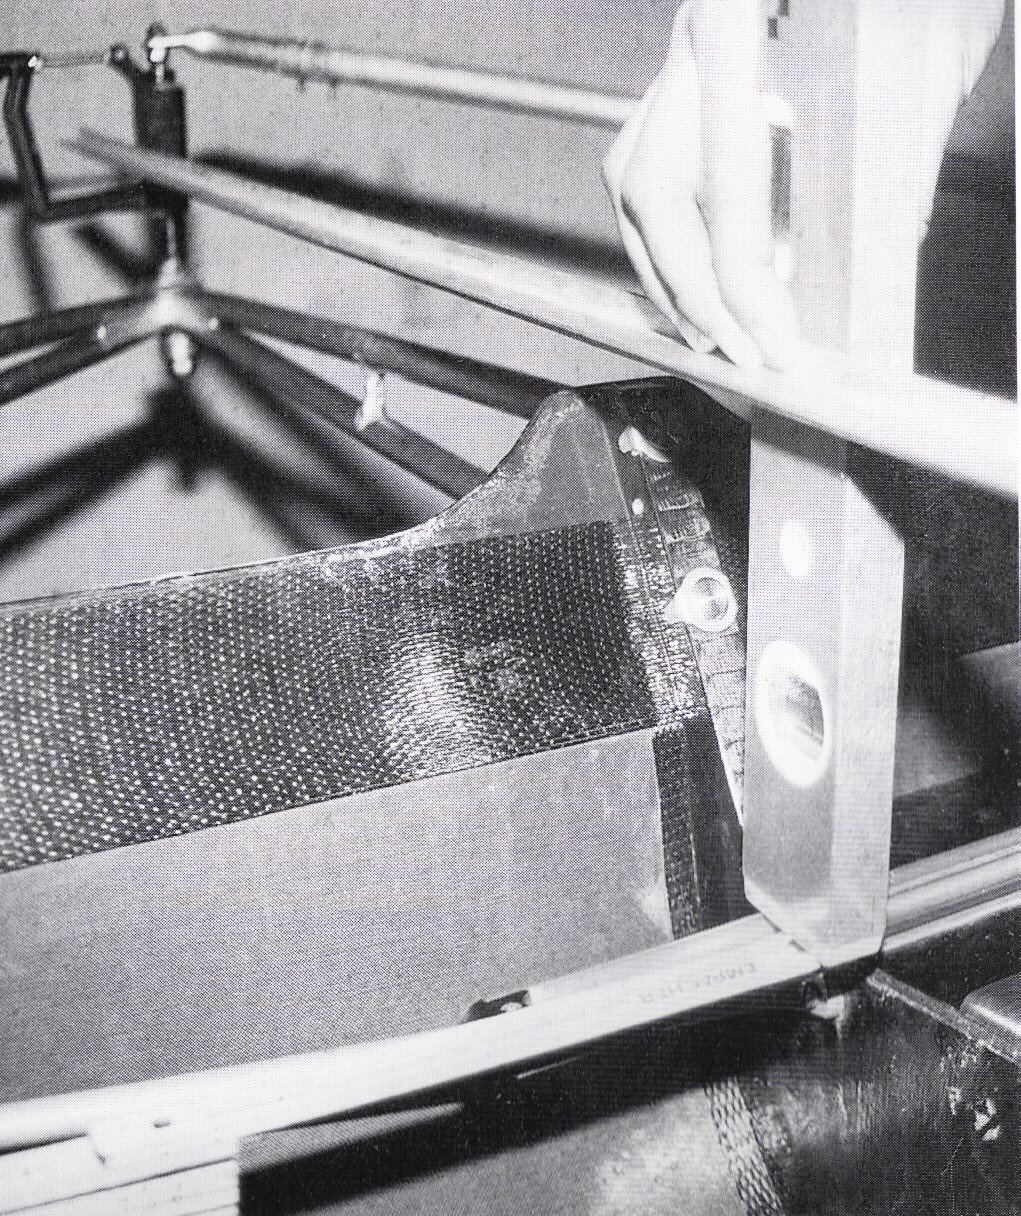
To determine the position of the front-stops towards the oarlock-pin in a sculling-boat we put a ruler from one oarlock to the oarlock on the opposite side. Lean the ruler against the pin-side of the oarlock. With the water-level we mark vertical down on the slides.
In sweeping-boats we measure from the oarlock-pin directed 90Ί towards the boat.
Pic.: measuring the position of the slides towards the oarlock-pin
11. The Foot-Stretcher
At a foot-stretcher are normally three possibilities for changes, that can effect the rowing technique, the teamwork and the well feeling of the athlete:
- The position of the foot-stretcher in boat direction
- The angle of the foot-stretcher
- The height of the foot-stretcher /shoes
11.1 The Position of the Foot-Stretcher in Alongside the Boat
This point of the boat-adjustment is most important for the rowing technique, especially stroke-size / work-space, power-application and teamwork in the boat. It orientates itself at finish-position and is depending on the leg-size, the anatomic condition (width / thickness) and the layback at the finish.
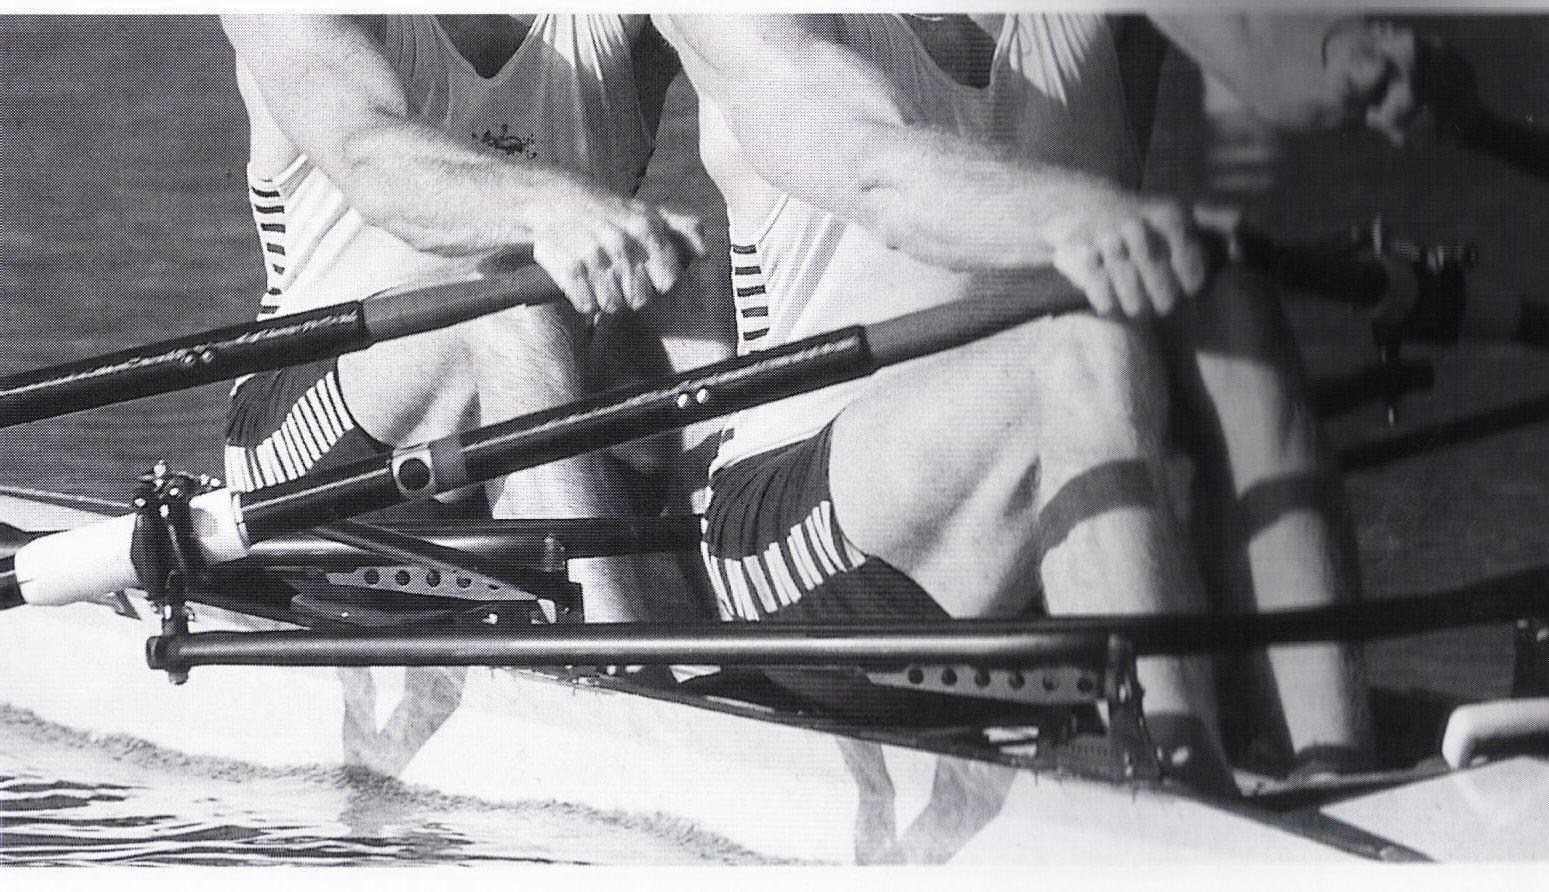 Especially in team-boats, the adjustment of the foot-stretcher should be paid special attention.
An orientation-point is the layback / finish, which should be equal at all rowers.
The foot-stretcher should be adjusted this position: In a sculling-boat with the Waistcoat-Pocket-Probe (At the finish the spread thumbs have to touch the lower/outer rips, ~10cm from the middle).
In sweeping: the outside hand should reach the finish without kink in the hand-wrist. (The wrist is plain and straight, the end of the inboard / grip fits to the outside of the trunk, the direction of the draw is alongside the bow).
The adjustment of the foot-stretcher is done by remove on a nogged channel.
11.3 The Arc of the Foot-Stretcher
The arc of the foot-stretcher id defined as the angle between the foot-stretcher and the horizontal-line.
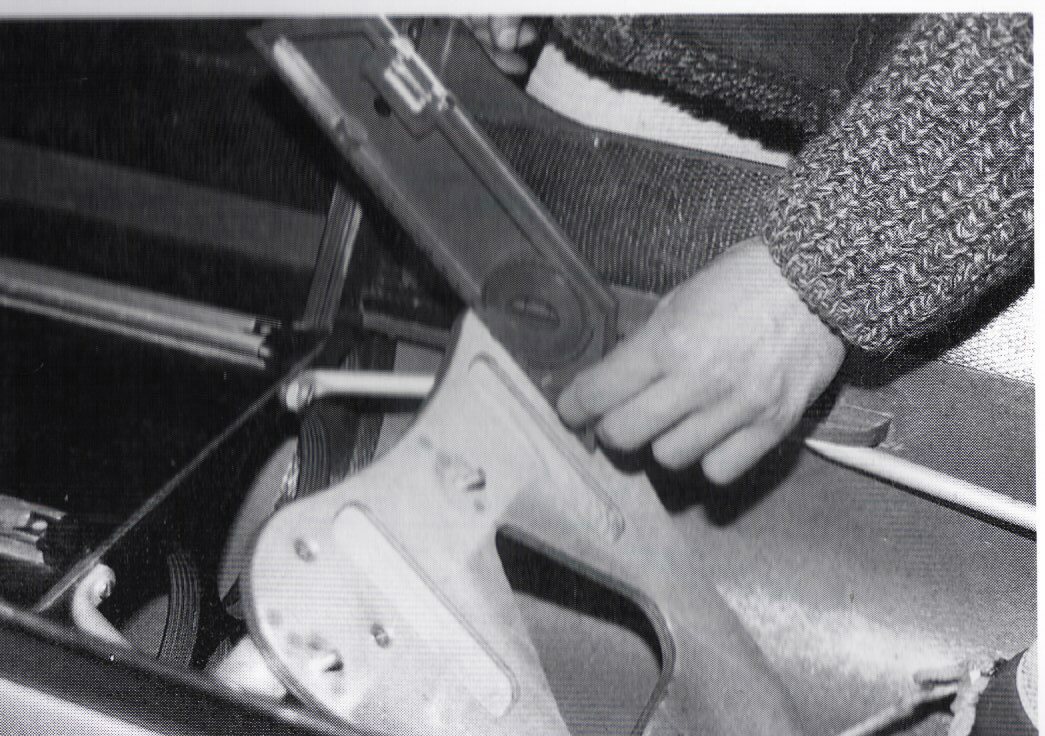
It depends most on the mobility of the rower in the ankle-joint and is closely connected with the height of the foot-stretcher, which also can effect the mobility negative.
Too steep and too high foot-stretcher can limit the mobility and lead to problems while trying to reach a long and comfortable catch-position.
Empirical angles are between 40Ί and 45Ί
Pic.: Measuring the foot-stretcher-angle
11.4 The Height of the Foot-stretcher
The height of the foot-stretcher is defined as the distance between the lowest point on the slide-seat to lowest point inside the rowing-shoe.
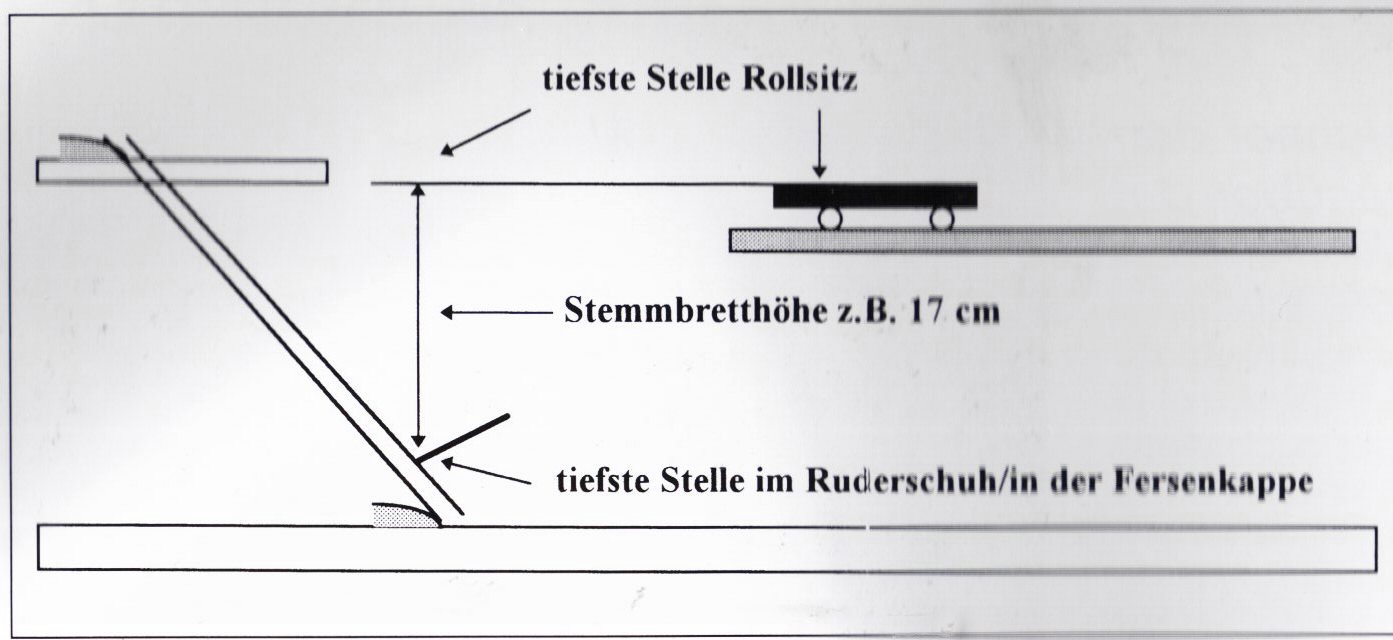 |
For the correct adjustment is the length of the lower leg / respectively the relation lower- to upper leg relevant.
Too high or low adjustments of the foot-stretcher lead to an overreach or too short reach.
A higher adjustment is a proper way to limit the catch-position (lower length is vertical).
Lower adjustment can lead to a longer slide-way.
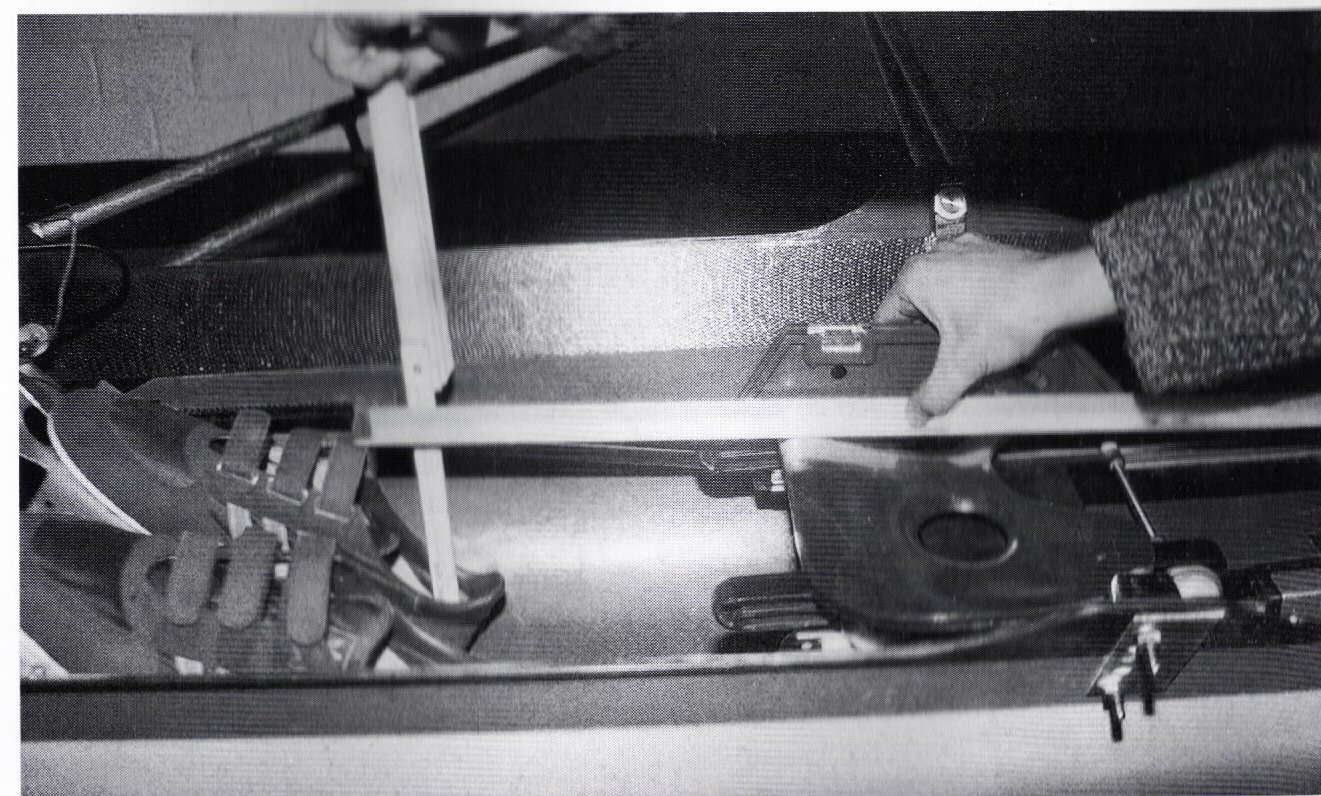
11.4.1 Determination of the Foot-Stretcher-Height
The distance from the lowest point inside the rowing-shoes depend on the length of the lower leg and should be: 15 20 cmThe adjustment is done through rows of holes on the foot-stretcher-plate.
 |
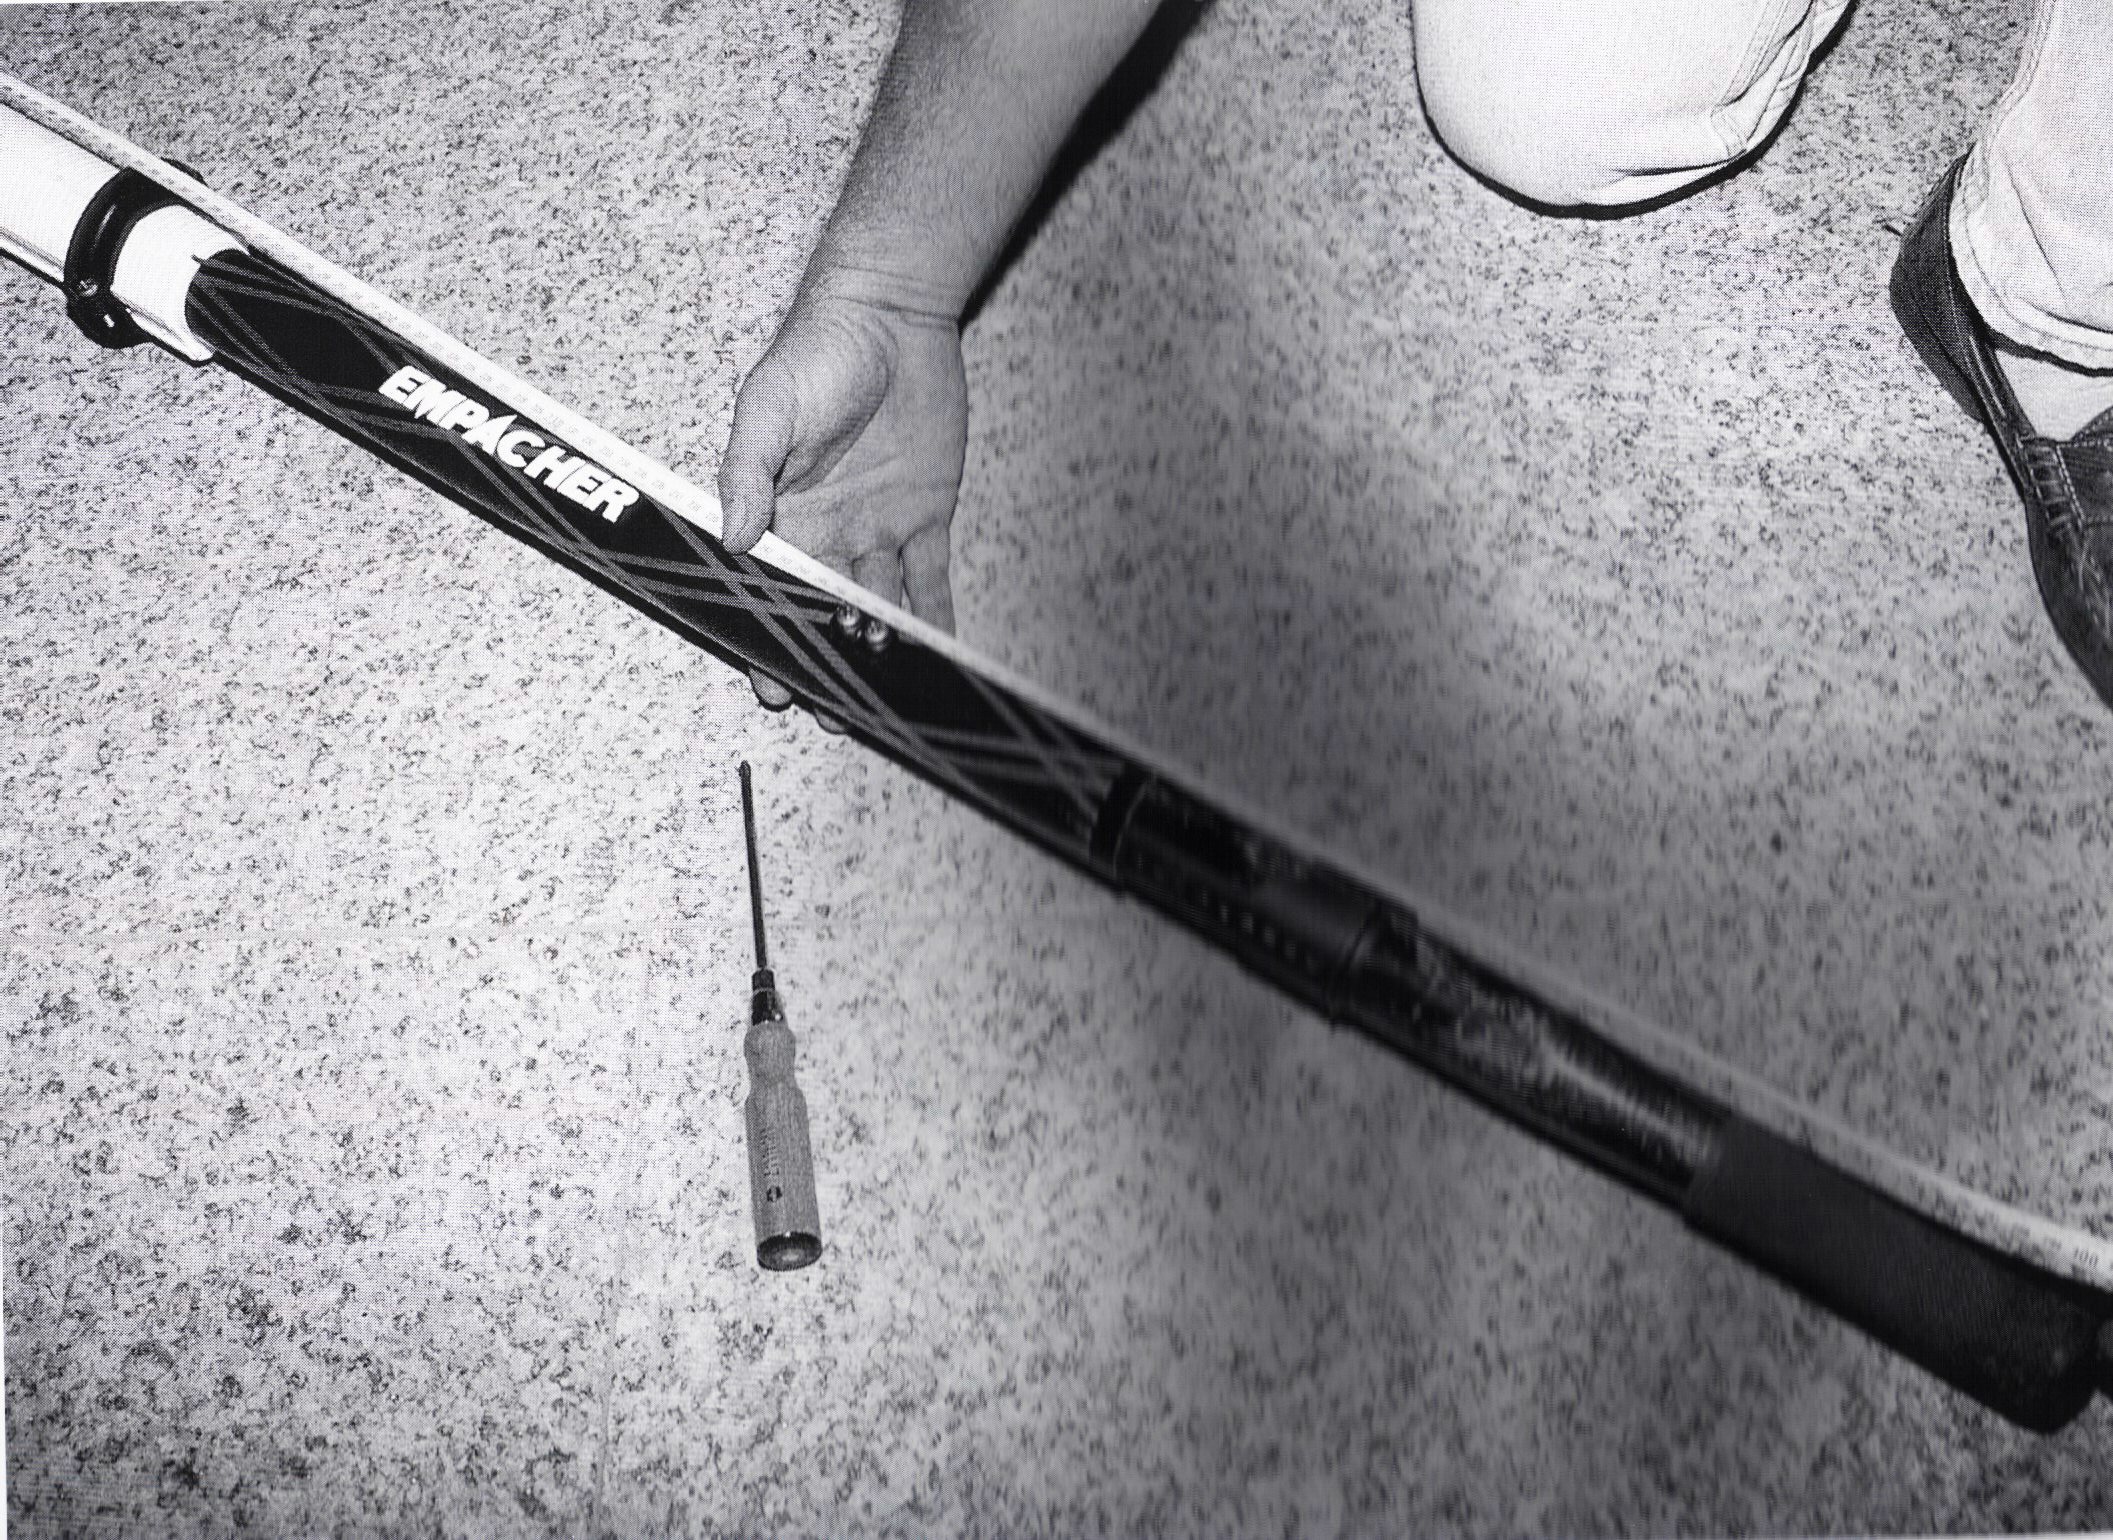
12. The Length of the Sculling / Sweeping Oar
Modern oars have the mechanic possibility to vary the length.
Important is to measure the oar over the sleeve
 |
The following table shows recommendations for the length of oars and inboard:
|
||||||||||||||||||||||||||||||||||||||||||||||||||||||||||||||||||||||||||||||||||||||||||||||||
13. The Inboard
Overall-Length (Measure over the sleeve / also at Big Blades)
 |
Pic.: Measuring sculling and sweeping-oars
The following formulas determine the Overlap:
|
||||||||||||||||||||||||||||||||||||
Important Boat-Measurements
|